
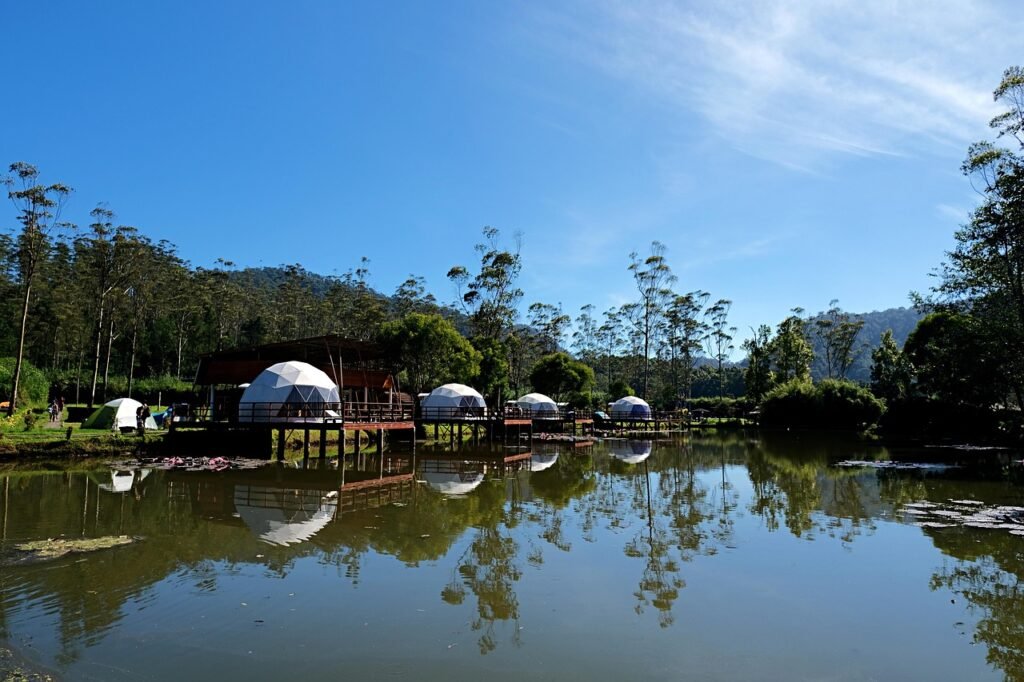
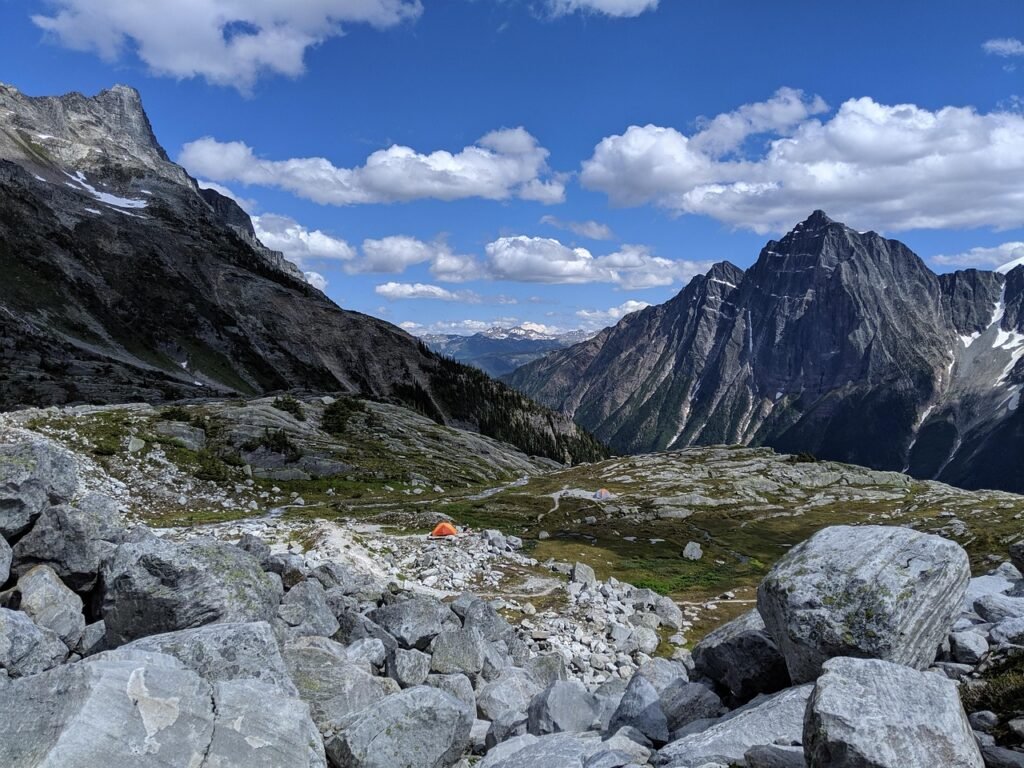
Camping on a budget is all about making great memories without high costs.
Thinking about a family camping trip but worried about the cost? You’re not alone! The good news is that camping can be one of the most affordable vacations – even though camping in a tent is already a cheap getaway, little expenses can still add up if you’re not careful. With some planning, creativity, and our favorite frugal tips, you can gear up, eat well, and have a blast in the great outdoors without breaking the bank. Let’s dive in and get your family camping on a budget – adventure awaits!
Gear Hacks: Borrow, Rent or Buy Used
One of the biggest upfront costs of camping is gear. It’s tempting to rush out and buy all new equipment, but you can save a ton by borrowing, renting, or buying secondhand. Here’s how:
- Borrow from friends or family: Do you have a friend with a dusty tent in their garage, or parents who own camping gear they rarely use? Reach out and ask! Many people are happy to lend gear if you promise to take good care of it. This way you can try camping without the investment.
- Rent from outdoor outfitters: If you can’t find what you need to borrow, consider renting. Outdoor retailers like REI and local gear shops often rent tents, sleeping bags, and more for a fraction of the purchase price. Some universities or community outdoor programs rent gear to the public as well. Renting is perfect for expensive items you’ll use rarely. For example, a family camping starter kit could easily cost $600+ if bought new, but renting the basics for a weekend might be under $100 – a huge savings.
- Buy used gear: Embrace the thriftiness! Check thrift stores, yard sales, Facebook Marketplace, Craigslist, or GearTrade for gently-used camping equipment. Often you’ll find coolers, camp stoves, backpacks, and even tents at a steep discount because someone tried camping once and decided it wasn’t for them. Outdoor forums or local Facebook groups might have folks selling or even giving away old gear. Also keep an eye out for big retailers’ seasonal clearance events – for instance, REI’s Garage Sale (and end-of-summer clearance at stores like Academy or Dick’s) can have quality gear at 50% off. It might not be the latest model, but as long as it works, who cares?
- Prioritize essentials & quality: When you do need to buy, focus on the must-haves and get the best quality you can afford (even if used). It’s better to buy a good tent once than a cheap one that rips immediately. Look for reputable budget-friendly brands. For example, Coleman makes reliable tents and camping stoves that won’t break the bank, and Walmart’s Ozark Trail line offers super affordable tents and gear for beginners. You can often find a basic Coleman Sundome 6-Person Tent under $100 on sale – an excellent starter tent for family camping. And if you’re shopping in the fall, you’re in luck: the off-season is typically the best time to snag camping gear deals when retailers clear out inventory.
Pro Tip: Don’t forget the little things! Instead of buying pricey “camping” versions of items, raid your home or the dollar store. A cheap plastic tablecloth can serve as a ground tarp, and an old shower curtain makes a great rainfly liner. Use the kitchen gear you already have (old pans, spatula, kettle) for camp cooking rather than specialized camp cookware. This way you spend nothing extra on gear until you’re sure you love camping.
DIY Camping Solutions
You don’t need fancy gadgets for a fun and comfy campsite – a little DIY spirit goes a long way (and saves money). Try these DIY camping hacks to solve common camping needs on the cheap:
- DIY Lantern: Forget buying an expensive camping lantern. You can make a perfectly good lantern with a regular flashlight or headlamp and a jug of water! Fill a translucent water jug (or even a gallon milk jug) with water and strap your headlamp around it with the light facing inward. The water will diffuse the light, creating a soft ambient glow that illuminates your tent or picnic table. It’s a hands-free light and night-light for the kids in one. (If you don’t have a headlamp, a flashlight pointed into the jug works too.)
- Quick Fire Starters: Skip buying fancy fire starter logs. Make use of household trash: dryer lint + egg carton = instant fire starters! Pack dryer lint into the cups of a cardboard egg carton and drizzle some melted wax or hand sanitizer gel on top. Tear off a cup when you need to start a campfire – it lights quickly and burns long enough to catch your kindling. Another easy DIY fire starter is coating cotton balls with petroleum jelly and storing them in a film canister or zip bag; they’ll ignite with a single spark or flame. These DIY solutions are virtually free and get your campfire crackling in no time.
- Repurpose everyday items: Think creatively about what you have at home. An inexpensive shoe organizer (the hanging kind with pockets) can be hung from a tent ceiling or on a canopy pole to keep gear organized – use the pockets for sunscreen, bug spray, cards, snacks, etc., so your stuff isn’t scattered everywhere. Old pill bottles or Tic-Tac containers make perfect spice holders for your camp kitchen (fill with salt, pepper, and spices from home). A simple pool noodle slit lengthwise can cover the sharp edge of a tent floor (or make a comfy bumper on a camp table bench for kids). And don’t leave home without duct tape – wrap a few feet of duct tape around your water bottle or a pencil to have on hand for patching leaks, fixing a broken tent pole, repairing a tear in your sleeping bag, you name it!
- Dollar store hacks: Before your trip, hit the dollar store for cheap camping solutions. You can pick up glow sticks (fun for kids at night and helps you see them in the dark), plastic bins for washing dishes or organizing food, foil pans for cooking, clothespins (useful for everything), and ponchos/rain covers – all for a buck or two each. A foam pool noodle can even be turned into a DIY cooler insulator or cut into sections to pad your backpack straps. Get creative with those dollar deals!
Pro Tip: Keep a camping bin at home. Store all your essential camp gear (flashlights, cookware, first aid, toiletries, etc.) in a large plastic bin or tote. It keeps things organized and ready to grab-and-go for your next trip, which means you’re less likely to forget something and have to buy it on the road for double the price.
Essential Gear List
Wondering what gear you actually need for a family camping trip? It’s easy to overpack or overspend on gadgets. Stick to the basics – here’s an essential gear list to cover your needs (without filling up the minivan too much):
- Shelter: A suitable tent for your family (with a rainfly and stakes). If it doesn’t come with a tarp or footprint, bring a tarp to put under the tent for moisture protection. Don’t forget a mallet or hammer to drive tent stakes (or use a rock in a pinch). Optional: a lightweight tarp or canopy for extra shade/rain cover at your site.
- Sleeping Gear: Sleeping bags for each camper (or blankets from home if it’s warm weather). In summer, lightweight bags or even just sheets can work; in cooler weather, you’ll want warmer-rated bags. Sleeping pads or air mattresses are a must for comfort – yoga mats or foam tiles can also provide padding. Bring pillows (you can take ones from home or use a pillowcase stuffed with clothes). For little kids, favorite blankets or stuffed animals from home can help them sleep snug outdoors.
- Cooking & Dining: If your site has a fire ring, you might cook on the campfire, but it’s wise to have a camp stove (a simple 2-burner propane stove is affordable and very handy). Pack fuel (propane canister or charcoal, depending on stove/grill). Bring a couple of pots/pans (an old skillet and a medium pot work for most meals) – cast iron is fantastic for campfire cooking. Don’t forget basic cooking utensils: spatula, long tongs (for the grill or fire), a stirring spoon, and a knife. Plates, bowls, cups, and cutlery (go for reusable to save money and waste – you can use inexpensive plastic picnic sets or just bring some from home). A cooler to keep perishable food cold (more on keeping things cold later!). Also pack trash bags (leave no trace by packing out garbage) and paper towels or dish towels for cleanup. A small wash basin, sponge, and biodegradable soap make cleaning dishes easier.
- Food & Water: Plan your meals and bring enough food in sturdy containers (cooler for cold items, a bin for dry goods). Bring water – either large jugs of potable water or a big refillable water container. If the campsite has water, you can top up, but having some from home ensures you don’t have to buy pricey bottled water. A water bottle for each family member is essential for hikes and around camp. If you’re unsure about water quality, consider a water filter or purification tablets, but for car camping, jugs from home are usually fine.
- Clothing & Personal Items: Pack appropriate clothing layers for the weather (and extras for kiddos who will get dirty!). Sturdy shoes for hiking/exploring, plus sandals or old sneakers that can get wet if swimming. Rain gear (ponchos or rain jackets) if there’s any chance of rain – trust us, a dry camper is a happy camper. Hats and sunglasses for sun protection. Toiletries: toilet paper (some campsites run out), hand sanitizer, toothbrush/paste, biodegradable soap, wipes (lifesavers for quick cleanups), and any personal meds. Don’t forget plenty of sunscreen and insect repellent (nothing ruins a trip like sunburn or bug bites).
- Lighting & Tools: Each person should have a flashlight or headlamp for nighttime (headlamps keep hands free – even affordable ones will do). Pack extra batteries if not using rechargeables. A lantern for lighting up the picnic table is great (battery-powered LED lanterns are kid-safe and cheap). Bring a multitool or pocket knife for odd jobs (cutting rope, whittling sticks for marshmallows, etc.). A lighter or matches (in a waterproof container) for starting campfires or stove. Rope or cord can be handy (for a makeshift clothesline to dry towels or to tie something down). A roll of duct tape (yes, mentioning it again!) for emergency fixes. And consider a small camp shovel if you need to scoop coals or clear a tent spot – but not critical if you’re at a developed site.
- Furniture & Comforts: While not strictly essential, a couple of camping chairs or folding chairs make camp life more comfy (you can also sit on logs or blankets if needed). A camp table is usually provided at sites, but if not, a folding table or even a picnic blanket on the ground works. Bring a sleeping pad or foam play mat for toddlers to crawl on, if applicable. And perhaps a hammock if you have one – it’s an inexpensive luxury for afternoon naps (just make sure to use tree-friendly straps).
- Safety & First Aid: A well-stocked first aid kit (see our list below for a budget-friendly DIY kit) is a must. Also consider a basic tool kit (or at least a screwdriver, pliers, and wrench) if you need to tighten a screw on your stove or fix a tent pole. A whistle for each child can be a good safety item (teach them to blow it if they stray and get nervous or lost). If camping in bear country, you’ll need a cooler lock or to use bear lockers (follow all local wildlife safety guidelines). For most areas, though, simply storing food in your vehicle at night is sufficient to deter raccoons or other critters.
That may seem like a lot, but you probably have many of these items already. And remember, you don’t need the high-end versions – go for affordable options or secondhand. As long as it’s functional, it’s perfect for budget camping!
Meal Planning: Affordable Outdoor Eating
Meal time is often the highlight of a camping trip (hello, s’mores!), but it can also be a budget-buster if you’re not careful. Eating out near the campground or buying firewood and snacks on site gets expensive fast. The key to affordable outdoor eating is planning and prepping your meals ahead of time. Not only will you save money, but you’ll likely eat better, too!
Here are some frugal meal planning tips for camping:
- Plan a simple menu: A little planning goes a long way. Before the trip, map out each day’s meals and snacks. Opt for simple, filling recipes that use few ingredients and minimal cookware. One-pot or one-pan meals (soups, chilis, pasta, stir-fry) and foil packet meals are your best friends. For example, instead of a fancy three-course dinner, grill some hot dogs or make hearty foil-pack dinners (ideas below!). Simpler meals mean fewer ingredients to buy and less fuel used for cooking.
- Prep at home: Do as much chopping, marinating, and pre-cooking as you can in advance. Not only will this save time at camp (a godsend when kids are hungry now), it also cuts down on the kitchen gear you need to bring. Dice onions, mix pancake batter (or pack a just-add-water mix), and marinate meat in Ziploc bags before you leave. Pre-measure spices or make a “spice kit” with small portions of salt, pepper, and seasonings so you’re not bringing full jars. If you drink coffee, pack ground coffee and use a simple drip cone or French press instead of expensive single-serve packets.
- Bring your own food and snacks: Camp stores and gas stations know they have a captive audience and often charge a premium. So do your grocery shopping at your regular store or Aldi before you go. Buy in bulk and pack in reusable containers or bags. Bring plenty of snacks (fruit, granola bars, trail mix) to stave off the temptation of campground ice cream or vending machines. If your kids have a favorite treat, bring it along as a surprise so you won’t be tempted to buy pricey treats on-site.
- Use regular grocery items: You don’t need specialized “camping food.” In fact, those pre-packaged dehydrated camping meals are very expensive per serving. Stick to regular foods that your family already enjoys. For example, instant rice or ramen noodles can be a base for meals, oatmeal packets make quick breakfasts, and sandwiches or wraps are easy lunches. Utilize common ingredients across meals to save money and avoid waste. (If you need half an onion for burgers, use the other half in tomorrow’s eggs, etc.) By using normal ingredients and not over-complicating recipes, you’ll keep costs down and cooking stress-free.
- Keep it cheap and cheerful: Some of the best camp meals are also the cheapest. Think tacos, chili, spaghetti, grilled cheese, pancakes – none of these will bust the budget. Eggs are inexpensive protein for breakfast (break them into a bottle at home for easy scrambling). A loaf of bread, jar of PB&J can cover lunch for days. For dinner, classics like hot dogs or veggie skewers over the fire are fun and filling. Don’t underestimate a good campfire baked potato (wrap in foil, throw in coals) topped with canned chili – it’s delicious and costs maybe $1 per serving!
- Bring water and stay hydrated: Buying bottled water or jugs at the campground can add unnecessary cost. Fill large water jugs at home (you can use clean 1-gallon milk jugs or invest in a 5-gallon water container to reuse each trip). For drinking, give everyone a reusable water bottle. If the weather’s hot, homemade lemonade or iced tea mix can be a cheap treat. Don’t pay for water if you can avoid it – you’ll save money and create less waste. If you’re concerned about water purity at the site, a basic water filter or even boiling water works.
- Use your cooler wisely: Treat your cooler like a fridge. Pack it full (a full cooler stays cold longer) and keep it in the shade. Start with cold/frozen items – you can freeze meats, a bottle of water or two, and even prepared chili or soup, and use them as ice packs. This freezes double method keeps food cold and gives you meals as they thaw. Also, try to open the cooler as little as possible – grab what you need then shut it to keep the cold in. If you’re camping more than a couple days, consider using one cooler for drinks (which people go into frequently) and one for food (which can stay closed most of the day). That way your ice lasts longer and you won’t need to buy more daily.
Pro Tip: Freeze a few water bottles or juice cartons and use them as ice packs in your cooler. They’ll keep your food cold, and you’ll have cold drinks as they melt – win-win! Also, save any leftover ice in your cooler – don’t dump the cold water, as it helps keep things chilled.
Easy and Affordable Camping Recipes
You’ve planned your meals – now here are a few easy camping recipes that are big on taste and low on cost. Each uses simple ingredients, minimal equipment, and comes in at just a few dollars per serving:
- Foil-Pack BBQ Chicken and Veggies (Cost: ~$5 per serving) – Ingredients: Boneless chicken thighs, potatoes (or sweet potatoes), carrots, onions, your favorite BBQ sauce, salt & pepper. Directions: At home, chop the veggies and toss with a little oil, salt, and pepper (and even season the chicken and let it marinate in the sauce). At camp, place a chicken thigh (or two, if small) on a large sheet of foil, add a handful of veggies on top, and drizzle 2-3 tablespoons of BBQ sauce over everything. Wrap the foil packet tightly (use an extra layer of foil to prevent leaks) and place it on hot campfire coals or on a grill over the fire. Cook about 20-30 minutes, flipping/rotating occasionally, until chicken is fully cooked and veggies are tender. No pots needed! This all-in-one meal is hearty, delicious, and cleanup is a breeze (just toss the foil).
- Campfire Black Bean Nachos (Cost: ~$4 per serving) – Ingredients: Tortilla chips, one can of black beans (drained), shredded cheddar or jack cheese, jarred salsa, any optional toppings you like (jalapeños, corn, olives, etc.). Directions: Take a cast iron skillet or a disposable foil pan and layer a generous portion of chips, then beans, then cheese. Repeat for a second layer. Cover the skillet with foil. Place over the campfire grill or on the grate for about 5-10 minutes until the cheese melts and beans warm. Remove from heat, add salsa and any fresh toppings. Tip: If you don’t have a fire grate, you can also cover the nachos with foil and place the foil packet in the coals. These nachos are a hit with kids and adults alike – gooey, shareable, and cheap. (We’ve made a big skillet full for under $4 per serving[12]!)
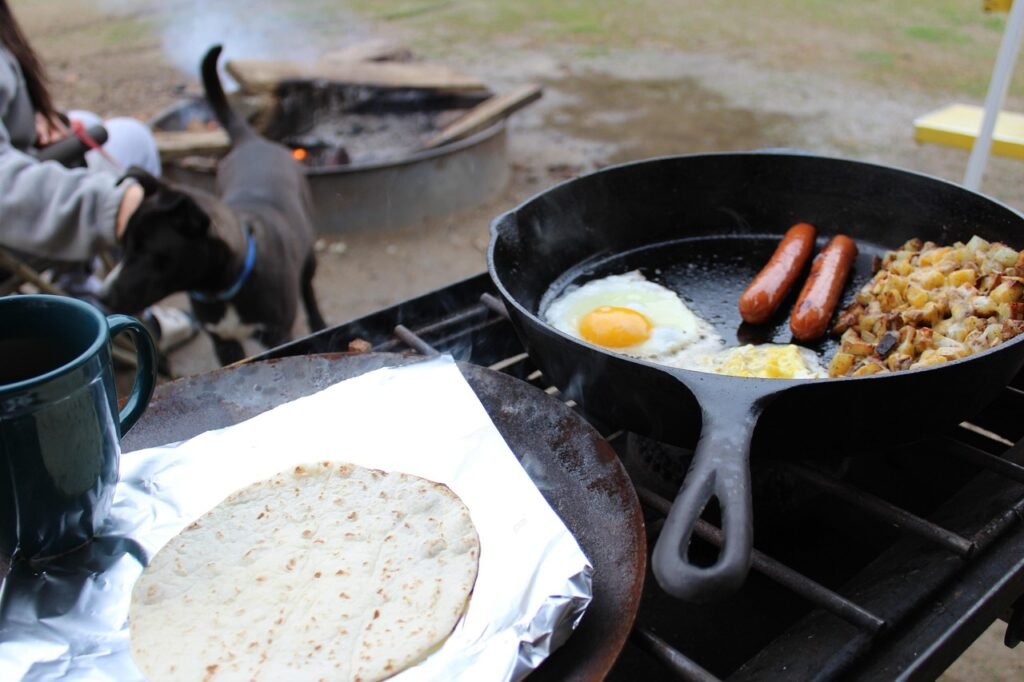
- Make-Ahead Breakfast Burritos (Cost: ~$3 each) – Ingredients: Large flour tortillas, eggs, breakfast sausage or bacon (optional), shredded cheese, and any add-ins like diced peppers or onions. Directions: Do the prep at home: scramble a dozen eggs in a pan (and cook the sausage/bacon if using). Season with salt, pepper, maybe a dash of hot sauce. Warm the tortillas slightly (to make them pliable), then fill each with a scoop of eggs, some crumbled sausage/bacon, and a sprinkle of cheese. Roll up each burrito and wrap tightly in foil. Keep them in the fridge or cooler. At camp, to reheat, just place the foil-wrapped burritos near the fire (not directly in flames) or on a grill for about 5-10 minutes, turning once, until warmed through and cheese melted. Unwrap and enjoy a hearty hand-held breakfast. These are super convenient – no pots or cleanup in the morning – and cost just a few bucks each (much cheaper than stopping for fast food breakfast on the way!). Bonus: If you have extra, they make great snacks later in the day.
- Campfire Banana Boats (Cost: ~$1-2 each) – Ingredients: Bananas, chocolate chips or candy bars, mini marshmallows. Directions: Slice each banana lengthwise down the curve (peel on) to create a pocket – don’t cut all the way through. Stuff the banana with chocolate chips and marshmallows (be generous!). Wrap the whole banana in foil. Place in the campfire coals or on the grill for about 5 minutes, until the banana and chocolate melt into gooey goodness. Eat with a spoon straight from the peel. It’s like a self-contained s’more-ish dessert. Kids love these, and each banana boat costs very little to make.
Feel free to customize these recipes to your family’s tastes. The main idea is you can cook simple, tasty meals outdoors on a budget. Every meal doesn’t have to be hot dogs (though nothing wrong with those!) – with a bit of prep and a few ingredients, you can dine like camping royalty for just a few dollars per plate.
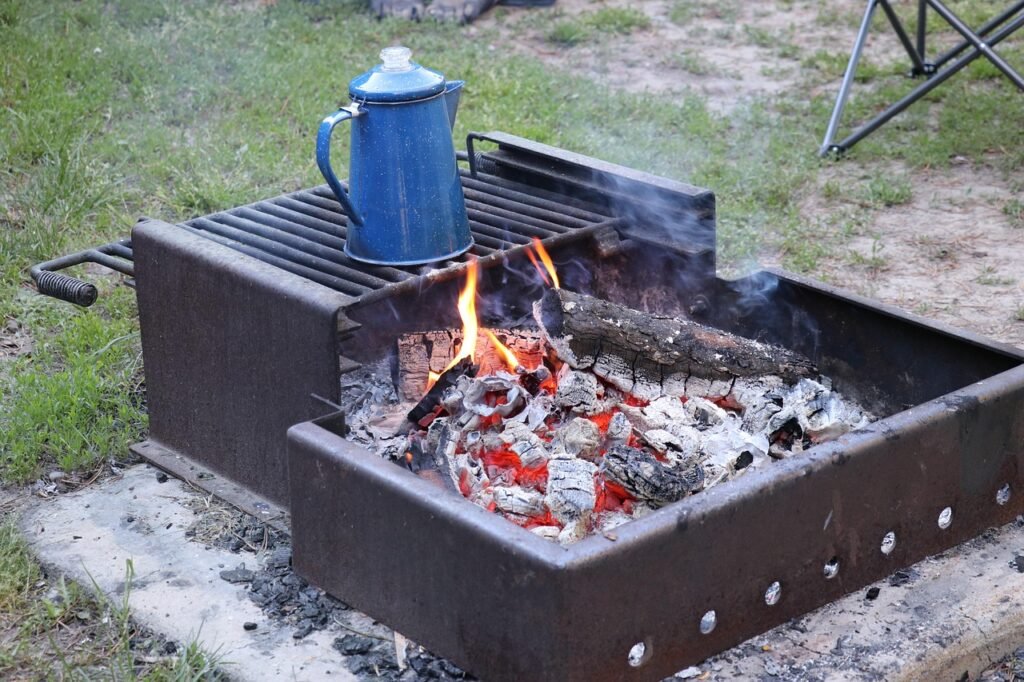
Pro Tip: Cook over the campfire when you can. It saves on stove fuel and it’s fun! Most campfire recipes (like foil packs and skewers) are very budget-friendly. Plus, cooking on wood you gathered (where permitted) is essentially free fuel. Just be sure to follow fire safety and local regulations about collecting wood. If campfire cooking isn’t allowed or convenient, a small propane stove is still very efficient for one-pot meals – and remember to avoid recipes with long cook times to save fuel.
Free & Fun Camping Activities for Kids (That Don’t Cost a Dime)
Telling stories around the campfire is a timeless, free activity that kids (and adults) love.
One of the best parts of camping is all the free entertainment provided by Mother Nature. There’s no need to pack a bunch of pricey toys or electronic gadgets – the outdoors will spark your kids’ imagination all on its own. Here are some free (or super cheap) activities to keep the whole family happy and engaged:
- Nature Scavenger Hunt: Before your trip, jot down a list of things the kids might find around the campsite or on a trail (different leaves, a feather, animal tracks, a smooth stone, something yellow, etc.). Hand-draw a simple scavenger hunt sheet or just call out items for younger kids. Then set them loose to find as many as they can. They’ll have a blast exploring. Maybe have a small prize for finding everything (or simply the pride of completion). This costs nothing and can occupy kids for hours.
- Wildlife Watching: Encourage kids to quietly observe birds, squirrels, and bugs around the site. Bring along a cheap pair of binoculars (even toy ones) for them to feel like little explorers. Early morning or dusk are great times to spot wildlife. You could even print out pictures of common animals or birds in the area and make a game of checking them off. It’s educational and exciting when they spot a deer or cool insect. And it’s completely free!
- Rock Painting or Crafts: Bring some basic art supplies like crayons or markers (or cheap watercolor paints) and let the kids collect smooth stones to decorate. They can paint faces on them, make paperweights, or create “pet rocks.” Alternatively, have them collect leaves, twigs, and pinecones and then make nature art back at camp – spell their name with sticks, make leaf rubbings on paper, or craft a fairy house from forest bits. These creative projects use found materials and maybe a few craft items from home, so no extra cost.
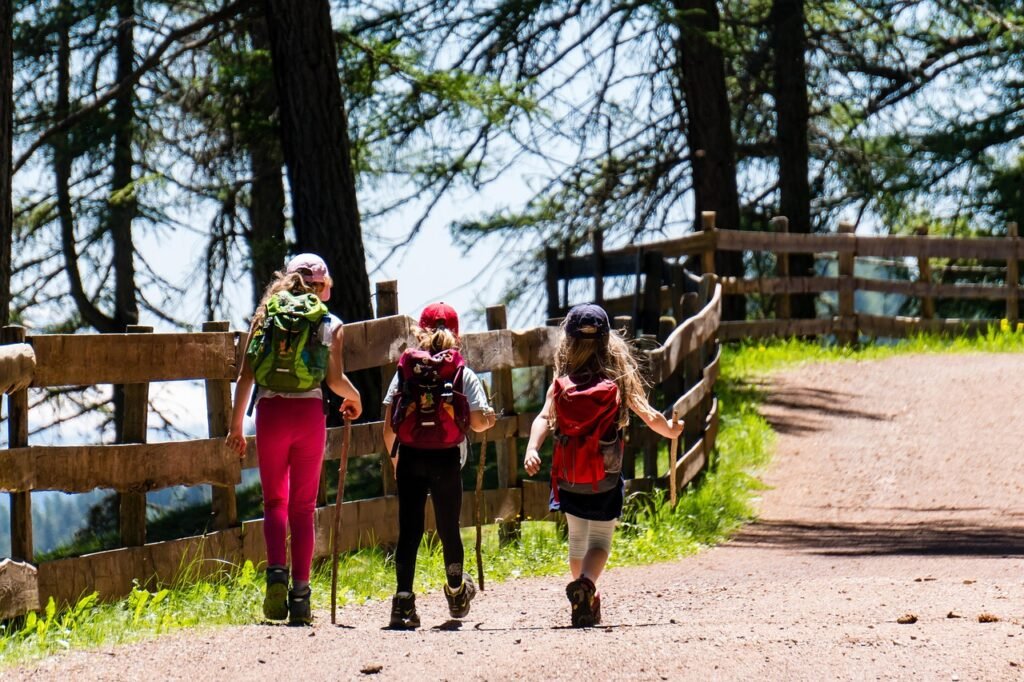
- Hiking Adventures: Take advantage of nearby trails or paths. A simple family hike can turn into an adventure with a little storytelling – pretend you’re explorers looking for treasure or animals. Let the kids set the pace and encourage them to notice things (ask questions like “Which tree do you think is the oldest?” or “Do you hear that bird?”). Even a short 1-mile hike can feel epic to a child. Pack a picnic to eat on a scenic overlook or by a creek for extra fun. Hiking costs nothing and burns off that kid energy!
- Stargazing at Night: There’s nothing quite like a sky full of stars away from city lights. Bundle everyone in blankets, lay back on a picnic blanket or recline in camp chairs, and gaze up at the cosmos. See who can spot the first shooting star or identify constellations. There are free smartphone apps that identify stars (download before you lose signal), or bring a star chart. Tell the kids the legends behind constellations or have them make up their own. Stargazing is magical, romantic, and 100% free. Don’t forget to wish on a shooting star!
- Campfire Stories & Songs: Of course, campfire time is classic. Toast marshmallows (a bag of marshmallows costs $2 and gives hours of entertainment!), then take turns telling funny or spooky (age-appropriate) stories. If your kids like performing, have them put on a silly “campfire skit” or sing some camp songs (yes, you might be singing Baby Shark under the stars – and that’s okay!). The memories you create laughing and storytelling around the fire are absolutely priceless.
- Outdoor Games: Bring a Frisbee, a football, or a simple kite – these can provide endless amusement in a big open field. Play flashlight tag or hide-and-seek at dusk. Card games or a travel-size board game in the tent are great for a rainy afternoon or calm evening. None of these require anything expensive: a deck of cards or even games made up on the spot (like who can build the tallest rock tower) will do. As one frugal camper put it, there is a “plethora of free and low-cost activities to keep everyone entertained in the great outdoors” – from ball games to astronomy – so you won’t run out of things to do.
Remember, the goal is to enjoy simple pleasures. Kids will remember roasting hot dogs, skipping stones on a lake, or catching fireflies more than any high-tech toy. Camping offers a chance to unplug and let creativity and nature lead the way. And that, fortunately, doesn’t cost a thing!
Pro Tip: Consider packing a “surprise bag” for the kids – fill it with a few dollar-store toys or nature activity kits (like a bug-catching net or a magnifying glass). If the kids start getting antsy, you can pull out a new surprise item. It’s amazing how a $1 packet of glow sticks or a bug exploration kit can save the day. But often, you won’t even need it because the camp itself provides all the entertainment!
Budget-Friendly First Aid Kit Essentials
Accidents can happen, especially with kiddos running around, so a first aid kit is a camping must-have. But you don’t need to buy an expensive pre-made kit. It’s easy to assemble a budget-friendly first aid kit yourself by picking up items at the dollar store or pharmacy. Here’s a simple chart of essential first aid categories and items, with estimated costs:
| Category | Essential Items | Estimated Cost |
| Medications | Pain relievers, antihistamines, anti-diarrheal medication | $10–15 |
| Wound Care | Adhesive bandages (various sizes), gauze pads, medical tape, antiseptic wipes | $8–12 |
| Tools | Tweezers, scissors, instant cold pack | $5–8 |
| Skin Protection | Sunscreen, insect repellent, aloe vera gel | $12–18 |
A few notes: You can find most of these supplies in travel-size or store-brand versions to save money (often in the dollar aisle). For medications, include basics like ibuprofen or acetaminophen (for pain/fever), Benadryl or generic antihistamine (for allergic reactions or bug bites), and anti-diarrheal pills – these cover most common ailments. Wound care: A variety pack of bandages, some sterile gauze, adhesive tape, and antiseptic wipes or a small bottle of antiseptic (like hydrogen peroxide or iodine) will handle scrapes and cuts. Add a small tube of antibiotic ointment if possible. Tools: Tweezers are super useful for splinters or ticks, scissors (or use your multitool scissors) are great for cutting bandages, and an instant cold pack can help sprains or bumps (stick one in your kit if you have room). Skin protection: Sunscreen and bug spray are not usually in a first aid kit, but they prevent a lot of first aid situations, so pack travel sizes in the kit. Aloe vera gel is a soothing relief for sunburns or any minor burns.
Pack all the items in a waterproof plastic box or even a zip-lock bag. Clearly label it “First Aid” and store it where it’s easily accessible in camp. Hopefully, you won’t need more than a Band-Aid or two, but you’ll feel better knowing you’re prepared without spending a fortune.
Pro Tip: Before each trip, check your first aid kit and restock anything you’ve used or that may have expired (things like ointments or solution packets do expire). It’s far cheaper (and easier) to replace items at home than to need them in the wilderness and not have them!
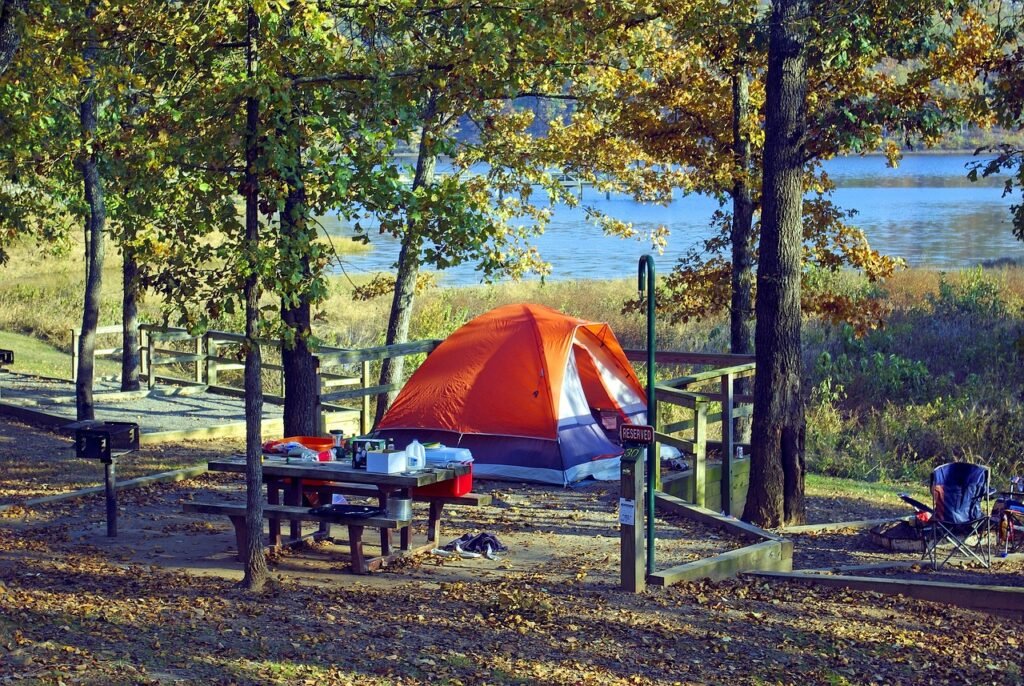
Sample 3-Day Budget Camping Itinerary (with Costs)
To show how affordable camping can be, here’s a sample 3-day itinerary for a family camping trip. This assumes a family of four, two nights at a state park campground, and a relatively nearby location. Your actual costs will vary, but this gives a ballpark idea of daily expenses on a shoestring camping adventure:
Day 1: Setting Up Camp
- Morning: Arrive at campsite, set up tent and basic camp structure
- Afternoon: Explore immediate surroundings with a mini nature scavenger hunt
- Evening: Simple foil packet dinner over campfire, followed by stargazing
- Estimated Daily Cost: $25 (campsite) + $15 (food) = $40
Day 2: Nature Exploration
- Morning: Oatmeal breakfast, then hike on free nearby trails
- Afternoon: Picnic lunch, followed by lake/river activities (swimming, skipping rocks)
- Evening: One-pot pasta dinner, campfire stories and games
- Estimated Daily Cost: $25 (campsite) + $20 (food) = $45
Day 3: Final Adventures
- Morning: Pancake breakfast, pack up most of camp
- Afternoon: Final hike or nature activity, using up remaining food
- Evening: Complete packing, head home with new memories
- Estimated Daily Cost: $25 (campsite) + $10 (food) = $35
Total Trip Cost for 3 Days (2 Nights): Approximately $120 for a family of four. Compare that to even a single night in a hotel or one dinner out for a family, and it’s clear how budget-friendly camping can be!
Of course, your costs can be even lower (if you camp at a free site or have shorter drive) or a bit higher (if you need to buy firewood, pay for park entry fees, etc.). But the point is, camping is an incredibly thrifty way to vacation. A little planning and budgeting, and you can enjoy a three-day family getaway for well under what a theme park day would cost.
Pro Tip: Keep all your receipts and tally up your camping expenses when you get home. You might find places to save even more next time. Maybe you packed too much food or didn’t need that extra bag of ice. Learning from each trip will make you an even savvier camping budgeter for the next adventure!
Common Questions on Budget Camping
You asked, we answer! Here are some common questions busy families have about camping on a budget – answered with our thrifty know-how:
When is the Best Time to Find Camping Deals?
Timing is everything when it comes to scoring deals on camping gear. Generally, the off-season is the gold mine for discounts. Retailers tend to put camping equipment on clearance in late summer and fall (think September and October), once the peak camping season winds down. You can often find tents, sleeping bags, and coolers at 20-50% off during this time as stores make room for winter stock. Another great time for deals is the holiday sales – keep an eye out around Black Friday/Cyber Monday and post-Christmas year-end sales for deeply discounted outdoor gear. Even Amazon Prime Day (in mid-summer) sometimes has good prices on camping items.
In addition to gear, consider the timing of your camping trip for deals. Campgrounds are usually cheapest outside of major holidays and summer weekends. If you can go camping in the shoulder seasons (spring or fall) or mid-week, you might snag lower campsite rates or find coupons/discount codes for campgrounds. Some private campgrounds offer promotions like “stay two nights, get one free” in the off-season. National and state parks often have fee-free days a few times a year (for example, National Public Lands Day in September waives entry fees). So if you plan your trip on those dates, you save on entrance or parking costs.
For fuel and travel costs, obviously gas prices fluctuate by season – they often rise in summer – so if you have flexibility, a trip in early fall might not only be less crowded but slightly easier on the gas budget too.
In short: shop for gear in the off-season and plan trips in off-peak times. Your wallet will thank you, and you’ll likely enjoy fewer crowds to boot!
How Can I Save on Camping Fuel?
Saving on “camping fuel” can refer to a couple of things: the fuel for your vehicle to get to the campground, and the fuel for your camp stove or lantern. Here are tips for both:
- Vehicle Fuel (Gasoline): With high gas prices, fuel can be a significant part of your trip cost. To save, first choose a closer campground if possible – less driving means less gas. Carpool with friends or family if you’re meeting up (one big vehicle is cheaper than two smaller). Keep your car well-maintained – proper tire pressure and a clean air filter can improve gas mileage. When it’s time to fill up, use apps like GasBuddy to find the cheapest gas in the area (sometimes just driving to the next town over saves 10+ cents per gallon). If you’re a Costco or Sam’s Club member, fuel up there for lower prices. And try to avoid heavy traffic; sitting in jams wastes fuel, so leaving early or traveling at off-peak times helps.
- Camp Stove/Propane Fuel: To conserve propane or butane for your camp stove, cook smart. Plan quick-cook meals (pasta that cooks in 8 minutes instead of 12, for example) and keep pots covered to boil faster. As mentioned earlier, use the campfire to cook when you can – every meal over the fire is fuel saved (and firewood can often be gathered or bought cheaply). Avoid recipes with long cook times that would burn through your propane. For example, choose instant rice over slow-simmer rice, or chop foods into smaller pieces so they cook faster. Also, bring a camp kettle to heat water more efficiently (it’s faster than an open pot). If you have a dual-burner stove, you might only need to light one burner for most meals. For lanterns, consider LED lanterns or solar lights instead of fuel-burning lanterns – they’re safer and you won’t spend on propane or mantles. Lastly, one often overlooked tip: bring more fuel than you think you need so you don’t have to buy extra at a campground store (where it’s pricier). Any unused fuel can be saved for your next trip.
In summary, drive efficiently and cook efficiently. By camping relatively local, using tools like GasBuddy, and maximizing campfire cooking, you’ll trim your fuel expenses both in the car and at the campsite.
What’s the Best Way to Keep Food Cold Without Buying Ice Daily?
Keeping food cold on a multi-day trip without constantly replenishing ice is a common challenge. The strategy is to maximize your cooler’s efficiency:
- Start with a good cooler: You don’t need a $400 Yeti, but a decent cooler will perform better. Look for one with thick insulation (some affordable ones advertise “5-day ice retention” – those are great). A popular budget choice is the Coleman Xtreme series cooler, which is much cheaper than fancy rotomolded coolers yet can keep ice for several days if used right. If you camp often, this investment pays off by saving money on ice in the long run.
- Pre-chill everything: Cool the cooler itself beforehand (if you have space, store it in a cold room or throw a bag of ice in it a few hours before packing, then dump it). Freeze as much of your food and drinks as you can before the trip. Meats, bottled water, juice boxes, and even meals like chili can be frozen solid – they’ll act as ice packs and thaw over time, giving you cold food on later days. Even refrigerated items should be as cold as possible (bring them straight from your fridge to the pre-chilled cooler).
- Use block ice or ice packs: Instead of loose ice that melts quickly, use large ice blocks or reusable ice packs. You can freeze water in tupperware containers or milk jugs to make your own big ice blocks – they last longer than cubes. Or fill and freeze several water bottles; they’ll keep the cooler cold and you can drink the water as they thaw. Blocks of ice melt much more slowly, so you won’t need to replace ice daily.
- Pack the cooler smartly: Put ice/ice packs at the bottom and intersperse frozen items among your perishables. Pack the most critical perishables (meat, dairy) closest to the ice. Fill any extra space with towels or crumpled paper to reduce air (air warms up). Keep drinks in a separate cooler if you can, since that one will be opened frequently. The food cooler should stay closed as much as possible, ideally only opening at meal times. Every time it opens, cold air escapes, so tell the kids the cooler isn’t a fridge to stand in front of browsing.
- Keep it shaded: At camp, place your cooler in the shade (and in the shade all day if you can manage, moving it as needed). You can also cover it with a blanket or reflective emergency blanket to insulate from heat. If it’s really hot out, some campers even bury their cooler a few inches in the ground or keep it in the AC of a car during the day – but usually shade will suffice.
- Minimize water drainage: Don’t dump out the cold water that forms as ice melts – that cold water can still help keep the remaining ice and contents cool. Only drain if the water is submerging your food containers and you need to avoid sogginess. If everything’s in sealed containers or zip-lock bags (which we recommend), a bit of ice water at the bottom is fine.
By following these tips, you should be able to keep food safely cold for several days without daily ice runs. Many frugal campers manage a whole long weekend with one initial ice fill. And remember, eat the most perishable foods first (for example, have the raw chicken on night one and save hardy foods like carrots or hard cheeses for later). As a bonus, those frozen water bottle “ice packs” become cold drinking water, so you’re not wasting space.
How Can I Entertain Kids Without Expensive Toys or Gadgets?
One joy of camping is how it entertains kids in simple, natural ways – no iPads or fancy toys needed! Here are some strategies to keep children happy and engaged at camp, for free or cheap:
- Embrace the outdoors: Encourage kids to explore and play in nature. They can build fairy houses out of sticks, collect cool rocks, watch ants marching – things kids inherently find fascinating when given the time outdoors. Many families find that their children play more creatively at a campsite than they ever do at home, simply because nature provides an endless playground. Hiking, climbing on stumps, skipping stones – these will tire them out in the best way!
- Camp chores = fun: Believe it or not, kids often enjoy helping with camp tasks if you frame it as fun. They can gather small sticks for the fire (with supervision), help pump air mattresses, be in charge of the “camp garbage patrol,” or fetch water from the spigot. Make it a game or give them a “camp helper” title. They’ll feel proud and busy.
- DIY toys and games: Bring along a few low-cost items that spark imagination. For example, a simple kite to fly if it’s breezy, a frisbee or ball to kick around, or a deck of cards for Go Fish by flashlight. Bubbles are a hit with little ones and cost practically nothing. You can also DIY a nature bingo (make cards with things like squirrel, oak leaf, cloud, wildflower – and see who gets bingo first). At night, play flashlight tag or do shadow puppets on the tent wall. These kinds of activities require very minimal “stuff” and no electricity.
- Books and storytelling: Camping is a great time to unplug and maybe read or tell stories. Pack a couple of favorite books to read in the tent before bed. Or start a progressive story where each family member adds a line. Storytelling costs nothing and really engages their imagination (especially spooky campfire stories – kids love those, within reason!).
- Socialize with other campers: If there are other families at neighboring sites, kids often gravitate to each other on campground playgrounds or common areas. New friends can make outdoor play even more exciting – a game of tag with campground buddies, or sharing marshmallows around a communal fire. It’s old-fashioned neighborhood play, campground-style.
- Little surprises: As mentioned in the pro tip earlier, having a couple of surprise treats or toys in your back pocket can be helpful. For instance, glow bracelets for the kids to wear at night (so fun and also makes them easy to spot in the dark!), or a dollar-store bug catching net and jar if they get curious about insects. These small, inexpensive items can feel like a big treat when revealed at the right moment (“Look what I found in the gear bag – who wants a glow necklace?!”). But you might find you don’t even need them because nature is providing full entertainment.
Lastly, relax about mess and dirt – kids will get soooo dirty camping (and they’ll love it). Pack old clothes and let them play in the mud, splash in that puddle, or roll in the grass. It’s freeing for them and requires zero toys. You can always rinse them off before bed (even that can be a fun “camp shower” experience). The memories of chasing butterflies or making mud pies at the campsite will far outshine any memory of playing a video game at home.
In short, you truly do not need to spend money to keep kids entertained while camping. The combination of nature’s wonders and a parent’s creativity will beat an expensive gadget any day. Plus, you might find the whole family gets to act like kids together – and that’s worth everything.
Conclusion
Camping as a family on a budget is not only possible, it can be incredibly fun and rewarding. By using the tips in this guide – borrowing or thrifting gear, getting creative with DIY hacks, planning simple cheap meals, and focusing on free outdoor fun – you’ll spend far less than a typical vacation, all while making amazing memories under the stars.
Remember, it’s not about having the newest gear or gourmet camp food or pricey campground entertainment. It’s about being together in nature, laughing over silly campfire stories, teaching your kids how to toast the perfect marshmallow, and waking up to the sound of birds instead of an alarm. Those experiences are priceless, and you don’t need a big budget to enjoy them.
So pack up that hand-me-down tent, grab a cooler of homemade meals, and set off on your frugal camping adventure. The kids won’t remember how much you did or didn’t spend – but they’ll remember the flashlight tag, the constellations you pointed out, and how Mom or Dad taught them to fish at the lake. And you’ll likely start a family tradition of budget-friendly camping trips that you can repeat for years to come.
Happy camping, and happy saving! May your campfires be warm, your s’mores be gooey, and your expenses be ever low. Enjoy the great outdoors, the thrifty way!
Product Suggestions: (Useful gear picks to consider for your budget family camping trip!)
Coleman Sundome 6-Person Tent – A popular, easy-to-set-up tent that won’t break the bank. It’s roomy enough for the whole family and reliably weather-proof with its rainfly. An affordable classic from Coleman that will shelter your crew through many camping trips to come.
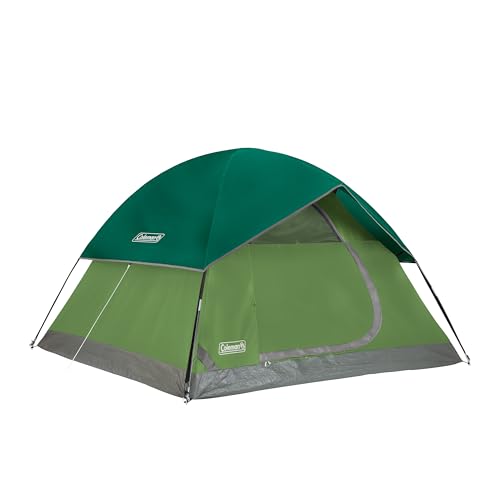
- WeatherTec system’s welded corners and inverted seams keep water from getting in
Coleman Classic Propane Camp Stove (2-Burner) – A tried-and-true camping stove for cooking up all your camp meals. It has two burners with adjustable heat, so you can boil water on one and flip pancakes on the other. Runs on small propane canisters and is very fuel-efficient. Durable, easy to clean, and usually around the $50 price point – a fantastic investment for countless campouts.
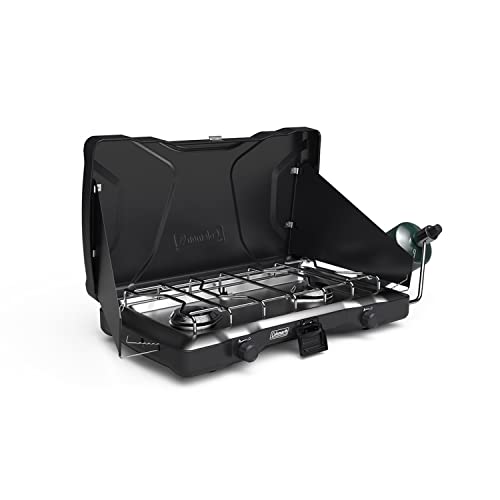
- PORTABLE: Easy addition to the campsite, picnic, roadside, and more
- TWO WIND GUARDS: Help shield and protect burners from wind
- HEAVY-DUTY LATCH: Easy to open and keeps the stove closed when not in use
Lodge 10-Inch Cast Iron Skillet – The ultimate campfire cooking pan. This cast iron skillet is super versatile – you can use it on a camp stove or right over the fire. It evenly cooks everything from bacon and eggs to one-pan dinners or even cinnamon roll-ups. Lodge cast iron lasts forever and only gets better with age. Plus, it’s relatively inexpensive for the decades of use you’ll get out of it.

- PFAS-FREE & NON-TOXIC COOKWARE: Lodge cookware is made without PFOA and PTFE, and we’re proud to say our seasoned cast i…
- SEASONED COOKWARE FOR EASY COOKING: Lodge pre-seasons every pan with 100% natural vegetable oil, giving it a non-stick f…
- RUST? DON’T PANIC! IT’S NOT BROKEN: If you notice a spot that looks like rust upon arrival, it’s just oil that hasn’t fu…
Coleman Xtreme 70-Quart Cooler – A high-capacity cooler with excellent ice retention (keeps ice up to 5 days in mild conditions). It’s big enough for a weekend’s worth of food and drinks for a family. The Coleman Xtreme series is beloved by campers on a budget because it performs almost as well as premium coolers at a fraction of the cost. Keep your perishables chilled without daily ice runs!

- FULLY INSULATED: Lid and body Keeps the Ice up to 5 days in temperatures as high as 90°F
- SWING-UP HANDLES: For easy carrying and lifting
- HIGH CAPACITY: Holds up to 100 cans
Vont LED Camping Lanterns (2-Pack) – A set of compact, bright LED lanterns that are perfect for lighting up your campsite or tent. They’re battery-powered (with a long life) so you don’t mess with fuel, and they even collapse down for easy packing. Two lanterns for one low price – one for the picnic table, one for the tent – and you’ve got safe, reliable light for all those camping nights.

- BRIGHT & LASTING – Equipped with 30 crazy bright LEDs, this compact lantern cuts through 360 degrees of darkness on the …
- COMPACT & LIGHTWEIGHT – Collapsible design that reduces or increases the light as you collapse or expand the lantern. Wh…
- WATERPROOF – Constructed with military grade materials, your lantern is able to survive a 10-foot drop and being tempora…
Teton Sports Celsius Sleeping Bag – A cozy, budget-friendly sleeping bag that comes in adult and kid sizes. Teton Sports makes quality bags at lower prices than many brands. The Celsius bag is built for comfort – it’s roomy and comes in various temperature ratings (choose one appropriate for the coldest temp you expect). It will keep you warm through spring, summer, and fall outings without costing an arm and a leg.
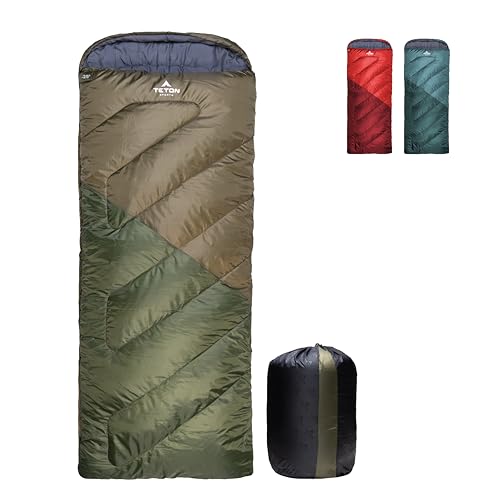
- SLEEP COMFORTABLY: You’ll forget you’re camping with these comfortable sleeping bags! With a soft poly-flannel lining an…
- Imported
- SLEEP COMFORTABLY: You’ll forget you’re camping with these comfortable sleeping bags! With a soft poly-flannel lining an…
Stanley Adventure Base Camp Cook Set (for 4) – This is a fantastic all-in-one cookware set for families. It nests a pot, pan, cutting board, spatula, serving spoon, plates, bowls, and sporks – all in one compact package! Stanley is known for durability, and this set is no exception. It’s perfect for car camping, containing almost everything you need to cook and serve meals, and often costs under $80 for the entire kit (which pays for itself vs. buying pieces separately). A super convenient investment if you plan to camp often.

- DELICIOUSNESS ON THE GO: Prepare enticing meals wherever adventure leads you with Stanley’s 6PC Even-Heat Essential Cook…
- EVEN HEATING, EVERY TIME: Whether you’re cooking over an alcohol stove, campfire, or twig burner, your food comes out ev…
- LEGENDARY STANLEY QUALITY: Go out camping, hiking, backpacking, or tailgating, and watch these outdoor cooking accessori…
Kids’ Outdoor Explorer Kit (Binoculars & Bug Catcher) – A fun little adventure kit for kids that usually includes binoculars, a magnifying glass, compass, flashlight, and bug-catching tools. This kit turns the outdoors into a big science playground for your children. They’ll be excited to go on nature hunts and inspect bugs, all while learning. These sets are typically affordable and make a great surprise gift to bust out at camp – turning a simple walk in the woods into a thrilling safari for the kiddos!

- 【Great Kids Camping Set】- GINMIC Kids Explorer & Bug Catching Kit Includes Binoculars, Costume Vest, Hat with Quick Rele…
- 【Perfect Gift for Kids】- Breathable explorer hat and vest are made from durable fabric to protect from the elements. It’…
- 【Explorer & Discover with Your Kids】- Outdoor exploration kit is a great playing set for parents to enhance their relati…
Coleman Portable Camping Chair (with Built-In Cooler) – A comfy folding camp chair that every parent will appreciate after a day of activities. It’s a standard camp chair with armrests plus a built-in cooler pouch in one arm that can hold a few cans or bottles – how neat is that? Use it to keep a cold drink or snacks at your side while you watch the kids play. The chair folds up for transport and is priced very reasonably. It’s a little camp luxury that won’t blow your budget.
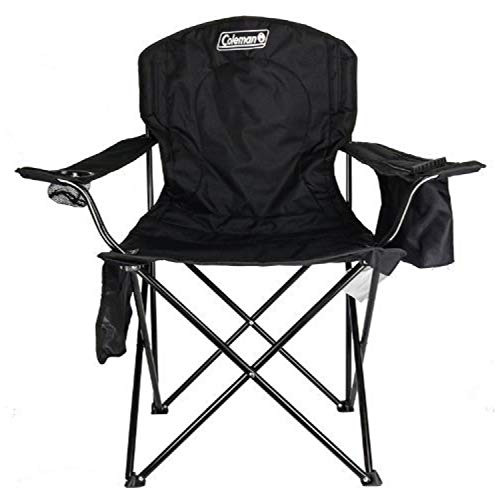
- Polyester
- Imported
- Coleman Cold – built-in 4-can cooler lets you grab a cold drink without getting up
Each of these items is something I’d personally recommend for families trying to camp affordably. They add comfort or convenience without a hefty price tag. Happy gear hunting!
This post may contain affiliate links, which means we might earn a small commission (at no extra cost to you) if you decide to make a purchase through one of these links. Thanks for your support!