Fall festivals and craft fairs offer a golden opportunity to earn extra income before the holiday season. With cooler weather bringing families outdoors and shoppers already thinking about seasonal decor and gifts, these events create the perfect environment for selling handmade items. Whether you’re a seasoned crafter looking to monetize your hobby or someone seeking a profitable side hustle, this guide will walk you through everything you need to know about selling at fall fairs successfully.
We’ll cover the most profitable products to sell, pricing strategies that maximize profits, booth setup techniques that attract customers, and a practical 10-day preparation plan. By the end, you’ll have all the tools you need to confidently book your first fall fair and start generating extra cash.
What Sells Best at Fall Fairs (And Why)
Understanding what customers are looking for at fall events is crucial to your success. Most shoppers at autumn markets are seeking three things: seasonal decor for their homes, small treats for themselves, and early holiday gifts. Let’s explore the most profitable product categories to consider.
Cozy Home Décor
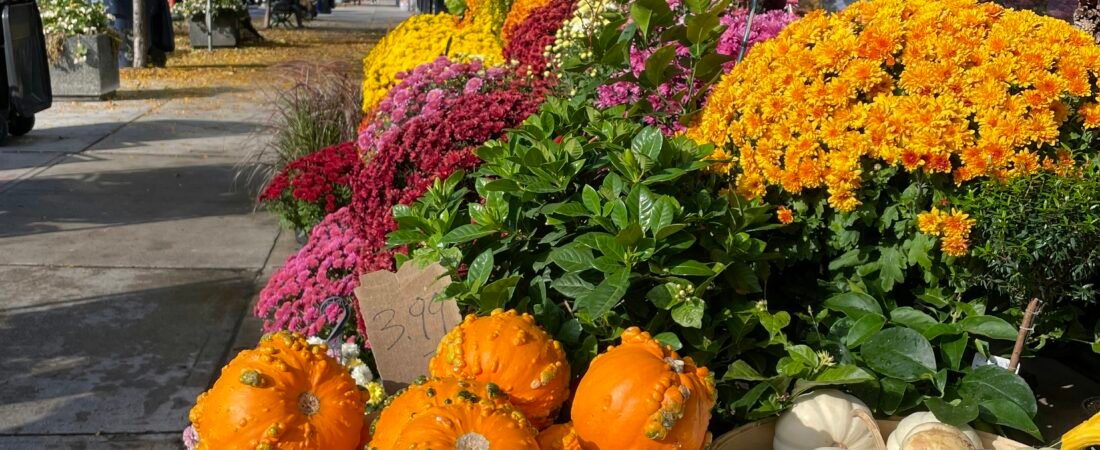
Fall-themed home decor consistently ranks among the top-selling categories at autumn fairs. Customers are eager to add seasonal touches to their living spaces.
- Wreaths with autumn foliage, wheat, or neutral elements
- Wooden or acrylic signs with fall sayings
- Table centerpieces featuring pumpkins or fall florals
- Garlands with felt leaves or fabric pumpkins
- Scented candles with fall fragrances (pumpkin spice, apple cider, etc.)
Consider offering items in various sizes and price points. Small accent pieces priced under $20 often sell quickly as impulse buys, while larger statement pieces can anchor your display and make everything else seem reasonably priced.
Seasonal Wearables
As temperatures drop, shoppers look for cozy accessories that add warmth and style to their fall wardrobes.
- Knitted or crocheted beanies and scarves
- Chunky scrunchies in autumn colors
- Flannel headbands and hair accessories
- Fingerless gloves or mittens
- Pet bandanas with fall patterns
Having a small mirror available lets customers try on accessories, increasing the likelihood of purchase. Including a simple size chart for wearables can also help overcome purchase hesitation.
Consumable Products
Food items and consumables often generate high sales volume due to their universal appeal and gift-giving potential. Always check event regulations regarding food sales before preparing inventory.
- Individually wrapped baked goods (pumpkin bread, apple muffins)
- Hot chocolate bombs or specialty drink mixes
- Fall-themed cookie decorating kits
- Autumn spice blends or mulling spices
- Preserved items like jams or pickles (check local cottage food laws)
Package consumables attractively with clear labeling that includes ingredients and shelf life. Many customers appreciate knowing how long items will stay fresh, especially if purchasing as gifts.
Budget-Friendly Items Under $20
Having a selection of affordable items is essential for maximizing total sales. These quick-win products often serve as entry points for customers who might later purchase higher-priced items.
- Small ornaments or hanging decorations
- Greeting cards or gift tags
- Coasters or small trinket dishes
- Mini candles or wax melts
- Sticker packs or small art prints
Group these items in attractive baskets with clear signage indicating price points or bundle deals like “3 for $25” to encourage multiple purchases.
Craft Fair Starter Tools
Having the right supplies on hand makes creating inventory much easier. Stock up on these essentials to streamline your production process:
Get Cardstock Paper Pack
Shop Mini Cellophane Bags
View Fabric Bundle Options
Pricing Strategies That Work at Fall Fairs
Setting the right prices is crucial for craft fair success. Your pricing needs to cover costs, reflect value, and still appeal to shoppers who are comparing multiple vendors. Here’s how to develop a pricing strategy that maximizes profits while encouraging sales.

Simple Pricing Formula
Use this straightforward formula as a starting point for pricing your handmade items:
Materials cost × 2-3 + hourly rate × time spent = base price
Example: $5 materials × 3 + $15/hour × 0.5 hours = $22.50, round to $25
After calculating your base price, round to easy numbers ($8, $12, $15, $25) that facilitate quick cash transactions. Having prices that end in 0 or 5 speeds up checkout and reduces the need for small change.
Create a “good, better, best” pricing ladder for similar items. For example:
- Good: Single scrunchie for $8
- Better: Set of 2 scrunchies for $15 (save $1)
- Best: Set of 3 scrunchies for $20 (save $4)
This approach gives customers options while encouraging them to spend more for better value.
Bundle Pricing and Volume Discounts
Bundles and volume discounts can significantly increase your average sale amount. Create attractive groupings of complementary items and offer a slight discount when purchased together.
“I noticed my average sale doubled when I started offering ‘Any 3 for $25’ deals on my smaller items. People love feeling like they’re getting a special value.”
Place bundle deal signs at eye level where they’re easily noticed. Use simple, direct language like “Mix & Match: 3 for $25” or “Buy 2, Get 1 Half Off” rather than complicated percentage discounts.
Payment Methods: Cash vs. Card
Being prepared to accept multiple payment methods is essential in today’s marketplace. While some customers still prefer cash, many shoppers carry only cards or digital payment options.
- Accept both cash and cards to maximize potential sales
- Use a mobile card reader like Square that connects to your smartphone
- Factor card processing fees (typically 2.6-3%) into your pricing strategy
- Keep a cash box with sufficient change ($50-100 in small bills)
- Consider offering alternative payment options like Venmo or PayPal
Having a receipt book handy for customers who request documentation of their purchase adds a professional touch to your operation.
Essential Payment Processing Tools
Make checkout quick and professional with these payment processing essentials:
Booth Setup That Attracts Customers
Your booth is essentially a temporary storefront. How you arrange your products, display your brand, and create visual interest can dramatically impact your sales. A well-designed booth draws shoppers in and makes your products easy to browse and purchase.

Display Basics: Go Vertical
Flat tabletop displays hide much of your inventory and fail to catch attention from a distance. Creating height and dimension makes your booth visible across a crowded venue and showcases more products in the same footprint.
- Use tiered display stands or risers to create multiple levels
- Incorporate crates, boxes, or shelving units to add height
- Position your best selling items at eye level (approximately 5-6 feet)
- Group similar items together by color or theme for visual impact
- Leave some negative space to prevent a cluttered appearance
Consider the visual journey through your booth. Place attention-grabbing items at the front to draw people in, then guide them through your display with logical product groupings.
Effective Signage
Clear, professional signage helps communicate important information and creates a polished appearance. Your signs should be legible from 4-6 feet away and consistent with your brand aesthetic.
- Create a prominent booth sign with your business name
- Use consistent price signs throughout your display
- Highlight special offers or bundle deals with dedicated signage
- Include a QR code linking to your social media or website
- Consider small descriptive signs for unique or unusual items
If you offer custom work, a simple sign stating “Custom Orders Available – Ask Me!” can generate additional business beyond the fair itself.
Lighting and Ambiance
Proper lighting dramatically improves the appearance of your products and helps your booth stand out, especially on cloudy days or at indoor venues with dim lighting.
- Use battery-operated LED clip lights to highlight specific products
- Add string lights or fairy lights to create a warm, inviting atmosphere
- Consider a small lamp if electricity is available at your booth
- Use lighting to draw attention to your highest-profit items
Complement your lighting with seasonal touches that enhance the fall atmosphere, such as artificial autumn leaves, small pumpkins, or wheat stalks as accents (not overwhelming your products).
Traffic Flow and Customer Interaction
How customers move through your space affects their shopping experience and your sales potential. Design your booth with traffic flow in mind.
- Position your checkout area to one side rather than center front
- Leave enough space for multiple customers to browse comfortably
- Place small impulse-buy items near your checkout area
- Consider where you’ll stand to greet customers without blocking displays
- If sampling products, designate a specific area with proper sanitation
Your personal presentation matters too. Stand rather than sit when possible, greet customers warmly, and be ready to answer questions about your products without hovering too closely.
Booth Display Essentials
Elevate your booth presentation with these display must-haves:
Inventory Planning and Preparation
Bringing the right amount of inventory is a balancing act. Too little, and you risk selling out early or missing sales opportunities. Too much, and you’re left with excess stock and wasted effort. Here’s how to plan your inventory strategically.

How Much to Bring
Use these guidelines to estimate appropriate inventory levels based on the expected attendance and duration of the event:
For a typical 6-8 hour fall fair with moderate foot traffic (500-1000 attendees):
- 60-80 items under $20 (quick-selling items)
- 30-40 items in the $20-40 range (mid-tier products)
- 10-15 premium items over $40 (statement pieces)
Apply the 80/20 rule to your inventory planning: approximately 80% of your sales will likely come from 20% of your product types. Identify your consistent bestsellers from previous sales or market research and ensure you have plenty of those items available.
Packaging and Presentation
Professional packaging enhances perceived value and protects your products during handling. It also speeds up the checkout process when prepared in advance.
- Pre-package small items in clear cellophane bags with labels
- Include care instructions for items that require special handling
- Add your business card or branded sticker to each package
- Have tissue paper and shopping bags ready for larger items
- Consider eco-friendly packaging options to appeal to environmentally conscious shoppers
For fragile items, demonstrate proper packaging during the sale to ensure customers understand how to transport their purchases safely.
Inventory Tracking
Keeping track of what sells helps you make data-driven decisions for future events. Implement a simple system to monitor your inventory throughout the fair.
- Create a spreadsheet listing all products with starting quantities
- Use a simple coding system on price tags to identify product types
- Take before and after photos of your display for visual inventory comparison
- Note which items generate the most interest, even if they don’t sell
- Track weather conditions and other factors that might influence sales patterns
After the event, analyze your sales data to identify trends and adjust your inventory strategy for future fairs. This ongoing refinement will maximize your profitability over time.
Inventory Management Tools
Keep your products organized and professionally presented:
Shop Clear Storage Bins
Get Packaging Supplies
View Label Makers
The 10-Day Fall Fair Preparation Plan
Success at fall fairs doesn’t require months of preparation. With focused effort and the right strategy, you can prepare everything you need in just 10 days. Follow this day-by-day plan to ensure you’re fully ready for your event without last-minute stress.

- Day 1: Select Your Product Mix
Choose your top 3-5 product categories based on seasonal appeal and your crafting strengths. For each category, decide on specific items and set production targets. Focus on having a mix of price points with emphasis on your most profitable items. - Day 2: Source Materials and Plan Display
Order any supplies needed for production. Sketch your booth layout on paper, including table placement, vertical displays, and traffic flow. Make a list of any display items you need to purchase or borrow. - Day 3: Finalize Pricing Strategy
Calculate costs for each product and set retail prices using the formula discussed earlier. Create a pricing sheet for reference and design price tags or signs. Determine any bundle deals or special offers you’ll feature. - Day 4: Begin Production
Start creating inventory, focusing on your most time-consuming items first. Work in batches to maximize efficiency (cut all materials first, then assemble, then finish). Set daily production goals to stay on track. - Day 5: Create Signage and Marketing Materials
Design and print your booth signage, price cards, and any promotional materials. Create business cards or information sheets for customers interested in custom orders. Generate QR codes linking to your social media or website. - Day 6: Continue Production and Test Display
Continue building inventory while setting up a practice display at home. Take photos of your mock setup for reference on event day. Make adjustments to improve visual appeal and product visibility. - Day 7: Prepare Payment Systems
Set up and test your payment processing system (Square, PayPal, etc.). Prepare a cash box with adequate change. Create a simple sales tracking sheet or set up digital inventory management if using Square or similar apps. - Day 8: Promote Your Participation
Announce your upcoming fair participation on social media with photos of your products. Share the event details with friends and family. Consider creating a special offer for followers who mention your social media post. - Day 9: Finalize Inventory and Pack Non-Essentials
Complete your remaining inventory production. Package items for sale and organize them in labeled containers. Pack display materials, signage, and booth essentials that you won’t need before the event. - Day 10: Final Preparations and Event Day
Pack perishable items and any last-minute additions. Review your checklist to ensure nothing is forgotten. Arrive at the venue early for setup, allowing at least 60-90 minutes before opening. Take a photo of your completed booth for future reference.
Essential Day-Of Checklist for Fall Fairs
Even with careful planning, it’s easy to forget important items in the excitement of event day. Use this comprehensive checklist to ensure you have everything needed for a successful selling experience.

Documentation and Admin
- Vendor confirmation and booth assignment
- Parking pass or parking information
- Business license or seller’s permit (if required)
- Event rules and regulations document
- Contact information for event organizers
- Insurance documentation (if required)
Display Equipment
- Tables and chairs (if not provided by the venue)
- Tablecloths and table runners
- Display stands, risers, and shelving
- Signage (business name, prices, special offers)
- Banner or backdrop (if using)
- Tent or canopy with weights (for outdoor events)
- Lighting (battery-operated or electric with extension cords)
- Mirror for wearable items
Sales Tools
- Products organized in labeled containers
- Price tags and labels
- Card reader and charging cable
- Cash box with change ($5s, $1s, and quarters)
- Receipt book or digital receipt system
- Shopping bags for customer purchases
- Tissue paper or bubble wrap for fragile items
- Business cards or promotional materials
- Order forms for custom requests
- Clipboard with inventory tracking sheet
Tools and Supplies
- Scissors, tape, and string
- Pens and markers
- Safety pins, zip ties, and clips
- Basic tool kit (hammer, pliers, screwdriver)
- Extra price tags and blank cards
- Tape measure
- First aid kit
- Hand sanitizer and disinfectant wipes
Personal Comfort Items
- Water bottle and snacks
- Weather-appropriate clothing (layers recommended)
- Comfortable shoes
- Hat and sunscreen (for outdoor events)
- Phone charger or portable battery
- Small fan or hand warmers (depending on weather)
- Lunch or meal plan
- Tissues and personal medications
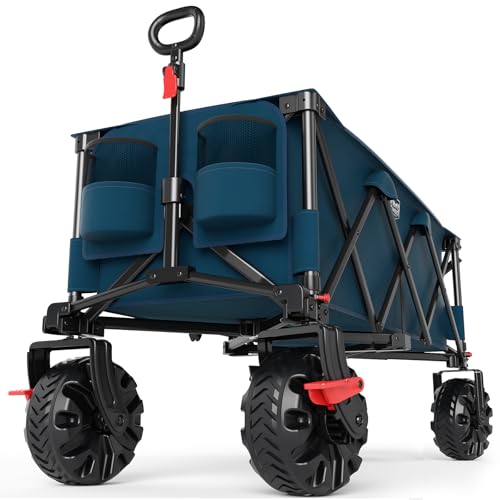
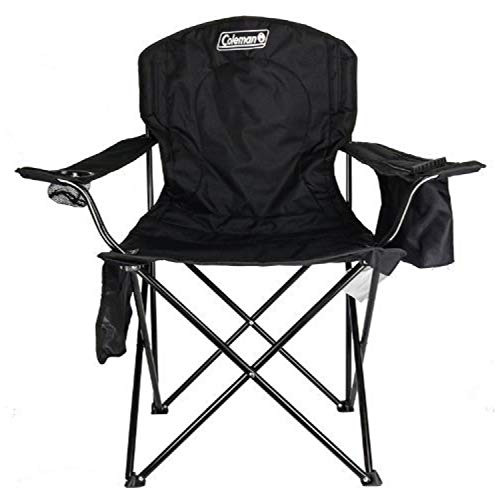
Essential Fair Day Tools
Make setup and teardown easier with these practical tools:
Shop Folding Wagons
Get Portable Phone Chargers
View Collapsible Chairs
Marketing Your Booth on a Budget
Effective marketing doesn’t require a large budget. With strategic use of social media, local connections, and simple promotional materials, you can drive significant traffic to your booth before and during the event.

Before the Event
Start promoting your participation 1-2 weeks before the fair to build anticipation and ensure your existing customers know where to find you.
- Create an event-specific post on all your social media platforms
- Share photos of new products you’ll be debuting at the fair
- Post a map or directions to your booth location once assigned
- Join local community Facebook groups and share event details (where permitted)
- Send an email to your customer list announcing your participation
- Create a special offer for customers who mention your social media post
Consider creating a simple “teaser” video showing your preparation process or highlighting a few special items. Even a 15-30 second clip can generate interest and shares.
During the Event
Maintain momentum with real-time updates that create urgency and draw people to your location.
- Post a photo of your completed booth when you finish setting up
- Share your exact location with landmarks (“near the main entrance” or “across from the food court”)
- Post mid-day updates highlighting popular items or limited quantities
- Create urgency with “almost sold out” or “last few available” messages for hot items
- Share customer photos (with permission) showing purchases or booth visits
If you’re offering demonstrations or special activities at your booth, post the schedule to attract interested visitors at specific times.
Building Your Customer List
Use the fair as an opportunity to grow your customer base for future sales and events.
- Create a simple email signup sheet or digital form
- Offer a small discount on a future purchase for joining your list
- Display a QR code linking to your social media profiles or signup form
- Include business cards or promotional materials with each purchase
- Collect emails from customers interested in products that sold out
After the event, follow up with new contacts within 48 hours while your interaction is still fresh in their minds. Share a thank-you message and information about your next event or online ordering options.
Marketing Tools for Craft Sellers
Create professional marketing materials with these affordable tools:
Try Canva Pro
Shop Phone Tripods
Get QR Code Generator
Understanding Rules, Safety, and Legal Considerations
Navigating the regulations surrounding vendor participation at fall fairs is essential for a smooth experience. Different venues and localities have varying requirements, so it’s important to understand what applies to your specific situation.

Event-Specific Requirements
Each fair or festival has its own set of rules that vendors must follow. Carefully review all documentation provided by the event organizers.
- Setup and breakdown times and procedures
- Booth size limitations and restrictions
- Prohibited items or activities
- Electricity availability and restrictions
- Parking arrangements for vendors
- Weather policies and cancellation procedures
If anything is unclear, contact the event organizers directly for clarification rather than making assumptions that could cause problems later.
Food and Consumable Product Regulations
If you’re selling food items or consumable products, additional regulations typically apply.
- Research your state’s cottage food laws for home-prepared items
- Obtain necessary permits or certifications for food handling
- Properly label all food items with ingredients and allergen information
- Follow safe food handling and sampling procedures
- Maintain appropriate temperature control for perishable items
Some events require food vendors to have specific insurance coverage or health department approvals. Verify these requirements well in advance of the event.
Sales Tax and Business Requirements
Understanding your tax obligations is an essential part of selling at public events.
- Obtain a seller’s permit or temporary sales tax license if required
- Understand how to collect and remit sales tax in your location
- Keep accurate records of all sales for tax reporting
- Consider obtaining business insurance for liability protection
- Research business license requirements for your locality
While these requirements may seem overwhelming, most are straightforward once you understand them. Many small business resource centers offer free guidance on compliance issues for craft sellers.
Weather Preparedness and Safety
For outdoor events, weather preparedness is crucial for protecting your inventory and ensuring safety.
- Secure your tent or canopy with proper weights (minimum 40 lbs per leg)
- Have a rain plan including tarps, plastic covers, or waterproof containers
- Prepare for wind by securing lightweight items and displays
- Know the event’s severe weather procedures and cancellation policies
- Consider weather insurance for high-investment events
Monitor the weather forecast in the days leading up to the event and be prepared to adapt your setup accordingly.
Frequently Asked Questions About Selling at Fall Fairs
New vendors often have similar questions about participating in fall fairs and craft markets. Here are answers to the most common inquiries to help you navigate your selling experience with confidence.
How far in advance should I apply for fall fairs?
Application timelines vary significantly by event. Popular, established fairs often open applications 6-9 months in advance and fill quickly. Mid-sized community events typically accept applications 2-4 months ahead, while smaller local events may have openings just weeks before. Research events you’re interested in and mark application dates on your calendar. Follow event social media pages for announcements about vendor opportunities.
How do I know if a particular fair will be profitable?
Research the event’s history, attendance, and reputation. Look for reviews from past vendors or ask in craft seller groups about experiences. Consider factors like booth fees versus expected attendance, the demographic match between attendees and your target customers, and whether the event is established or new. Start with lower-cost events while you’re learning what works for your products.
Do I really need to accept credit cards?
Yes, accepting credit cards significantly increases your sales potential. Many shoppers carry limited cash or none at all. Mobile payment processors like Square make it easy and affordable to accept cards with minimal fees. The increased sales volume typically far outweighs the processing costs. If you’re concerned about fees, you can slightly adjust your pricing to accommodate them.
What should I do if it rains during an outdoor event?
First, check the event’s rain policy before you commit. For events that continue despite rain, come prepared with a waterproof canopy, side walls if possible, clear plastic covers for your products, and waterproof containers. Elevate your products off the ground using tables and risers. Consider how you’ll protect your inventory during setup and breakdown when it’s most vulnerable. Some vendors bring extra towels and a change of clothes for comfort during long rainy events.
How much inventory is enough for my first fair?
For your first event, aim to fill your display space completely while having about 30% additional inventory in reserve. Focus on having variety rather than depth for your first event so you can learn what sells best. If you sell out of popular items, take custom orders or collect contact information from interested customers. After your first event, you’ll have better data to guide inventory planning for future fairs.
Should I offer discounts at the end of the day?
This depends on your products and business strategy. For perishable items or seasonal products with limited shelf life, end-of-day discounts can prevent waste. For durable goods that you can sell at future events or online, maintaining consistent pricing protects your brand value. If you do offer discounts, do so discreetly to avoid training customers to wait for markdowns at future events.
Ready to Start Selling at Fall Fairs?
Fall fairs and craft markets offer a wonderful opportunity to share your creations, connect with your community, and generate extra income during one of the busiest shopping seasons of the year. With proper planning, attractive displays, and strategic pricing, you can create a profitable side business that grows with each event.
Remember that your first fair is primarily a learning experience. Take notes on what works well and what you’d change for next time. Pay attention to customer feedback and purchasing patterns. Each event will help you refine your product offerings, booth presentation, and sales approach.
Most importantly, enjoy the process! Craft fairs are vibrant, social events where you can meet fellow creators and connect directly with the people who appreciate your work. That personal connection is something that online selling can never fully replicate.


This post may contain affiliate links, which means we might earn a small commission (at no extra cost to you) if you decide to make a purchase through one of these links. Thanks for your support!