Make the most of a small kitchen with simple, budget-friendly strategies that don’t require renovation. These practical ideas help you reclaim counter space, tame overcrowded cabinets, and make everyday cooking easier—whether you rent or own.
Introduction
Small kitchens are cozy, but limited counter space, crowded cabinets, and messy drawers can make meal prep frustrating. A full remodel isn’t the only answer—small changes and the right organizers can free up space, improve function, and refresh the design of your kitchen.
Below are 10 renter-friendly, budget-conscious ways to improve small kitchen organization. Each tip focuses on maximizing vertical storage, opening up counter space, and making everyday items easier to reach. Most solutions can be installed in minutes or require basic tools, and many work within a few inches of clearance.
- What you’ll learn: quick measurements to take, low-cost products that boost storage, and renter-friendly installation options.
- Time & cost expectations: most upgrades take 10–60 minutes and range from under $10 to about $75 each.
- How to start: pick one area (a cabinet, a drawer, or a small counter) and try a single organizer this weekend.
In the sections that follow you’ll find practical how-tos (including which inches to measure), suggested uses, and tips for choosing the best product for your space—plus ideas for turning a rolling cart or wall rack into a multi-purpose station.
1. Maximize Cabinet Space with Shelf Risers
Cabinets often have plenty of unused vertical space. Piling plates, bowls, or pantry items directly on top of one another wastes both storage and time when you need the item on the bottom.
Shelf risers create a second tier inside a cabinet so you can stack items more efficiently. In the right cabinet, a riser can effectively double usable shelving by turning one tall column of items into two accessible layers—no renovation required.
How to choose and install (quick checklist):
- Measure cabinet interior height in inches. Example: a 12″ tall cabinet often fits a 4–6″ riser plus items above and below; a 16″ cabinet can handle a 6–8″ riser for larger bowls.
- Measure shelf depth and check the riser length to ensure it sits flush on the shelf without overhang.
- Check load limits—wire and metal risers commonly hold 10–30 lbs; wooden risers can be sturdier but heavier. Don’t overload with heavy pots and pans.
- For renters, choose adjustable or freestanding risers that don’t require screws or drilling.
Recommended types:
- Adjustable wire shelf risers — lightweight, rust-resistant, and often budget-friendly ($15–$30).
- Wooden stacking organizers — more decorative and sturdy for plates and mugs ($25–$60).
- Two-tier corner shelf racks — ideal for awkward corner cabinets or turning a single deep space into layered shelves.
Before/after example: In a 12″ cabinet, a 5″ riser can split 12″ into two zones (roughly 5″ + 6″ usable plus clearance), letting you stack shorter items on both levels instead of one tall stack.

- [Flexible Storage Solutions] Whether you place them on the countertop as a convenient spice rack, stack them to maximize…
- [Contemporary Charm] The combination of engineered wood tops and white metal frames exudes a sense of refined simplicity…
- [Small Shelf, Giant Power] Though small and a simple structure, the kitchen organizers are powerful enough to hold up to…
💡 Pro Tip: Use risers in your pantry for canned goods and baking supplies to keep frequently used items at eye level and maximize vertical storage.
2. Use Door-Mounted Organizers
The backs of cabinet and pantry doors are one of the most underutilized spots in a kitchen. A door-mounted organizer turns that narrow space into useful storage for small items like spices, foil, plastic wrap, cutting boards, or cleaning supplies—without taking up shelf or counter space.
Over-the-door organizers come in many styles—from slim baskets to multi-tier wire racks—so you can pick the shape that fits your items and cabinet configuration.
Quick installation checklist (measure first):
- Measure the interior cabinet door width and the distance from the door to the shelf or cabinet face in inches to confirm clearance.
- Check hinge type and swing so the organizer won’t hit adjacent cabinets or prevent the door from closing fully.
- Confirm weight capacity—most wire racks hold 5–20 lbs; heavier cleaning supplies may need a sturdier mount.
- For renters, choose over-the-door, adhesive, or tension-fit options to avoid drilling; test adhesive on a hidden area to prevent finish damage.
Best uses by door location:
- Pantry door: slim spice racks, canned-goods pockets, or snack bins to free up shelf space.
- Under-sink door: hanging holders for spray bottles, sponges, and cleaning supplies—keep corrosive chemicals upright and away from plumbing leaks.
- Cabinet doors near prep zones: slim cutting board racks or foil/wrap dispensers for quick access.
Types to consider:
- Over-the-cabinet spice racks — slim, inexpensive, and ideal for small bottles.
- Hanging trash-bag or wrap holders — keep wraps and sandwich bags tidy and within reach.
- Multi-tier door racks — good for grouping cleaning supplies or pantry items by category.

- Maximize Your Space: Please measure the width of your door before purchasing to see if it can fit a 16.5″W shelf. Our 9-…
- Durable & Strong: Made with high-quality, durable metal, our pantry organization can withstand the weight of heavy cans …
- Quick & Easy Installation: No tools or drilling are required to install our pantry organizer over the door. This makes i…
👉 See over-the-door organizers here
💡 Pro Tip: Install a slim rack on the inside of an under-sink cabinet and reserve it for cleaning supplies that are sealed and stored upright—avoid placing anything that could corrode the cabinet or contaminate other items.
3. Add Under-Shelf Baskets
If your cabinets, pantry shelves, or fridge have extra headroom, clip-on under-shelf baskets convert wasted vertical space into practical storage. These baskets slide onto an existing shelf—no tools required—so they’re a great renter-friendly option.
Under-shelf baskets are perfect for smaller items that otherwise get lost: napkins, dish towels, coffee pods, snack packs, and single-serve pantry items.
Sizing & installation checklist:
- Measure shelf depth and vertical clearance in inches. A common setup: a 12″ deep shelf with 6–8″ of clearance under it is ideal for most under-shelf baskets.
- Check shelf thickness and whether the shelf has a front lip; most clip-on baskets fit shelves 0.5″–0.75″ thick, but verify the product spec.
- Note weight limits—wire baskets typically hold 5–15 lbs, while heavier-duty plastic or metal options support more.
- For fridges, choose food-safe plastic options that tolerate cold temperatures and are easy to wash.
Where to use them:
- Pantry shelves — create extra space for snack packs or boxed pantry items without rearranging entire shelves.
- Cabinet shelves — keep dish towels or lids accessible under a shelf used for plates.
- Refrigerator — add a shallow under-shelf basket for yogurt cups, cheese sticks, or deli packs (choose cold-safe materials).
Materials & product notes:
- Wire under-shelf baskets — breathable, sturdy, and best for dry pantry goods and linens.
- Plastic sliding baskets — good for fridge use and easy cleaning.
- Hanging baskets with adjustable clips — versatile for varied shelf thicknesses and depths.

- Instantly add storage space by using the underside of the shelf
- Under Shelf Baskets slide onto any shelf 1-inch thick or smaller
- This basket can store clothing, cleaning supplies, towels, bathroom accessories, etc.
👉 Shop under-shelf baskets on Amazon
💡 Pro Tip: Group items by use (breakfast, snacks, coffee) so you can grab what you need quickly and keep counter space clear.
4. Install a Magnetic Knife Strip
Counter space is precious in a small kitchen, and a bulky knife block can steal valuable prep area. A magnetic knife strip mounted on the wall reclaims counter space while keeping your knives visible, accessible, and off wet countertops.
Many magnetic strips also hold metal tools like kitchen shears, tongs, and small whisks, turning a short section of wall into a multi-purpose tool rack.
Safety & placement tips:
- Avoid mounting directly above an open flame or where splatter will be constant. Aim for 4–6 inches above the countertop or 12–18 inches above the stove surface if placed nearby—enough clearance for safe handling.
- Test magnet strength before committing: reputable stainless steel or heavy-duty magnetic strips should hold chef’s knives securely; adhesive-backed versions usually support lighter knives only. If you own heavy knives, choose a mounted strip with wall anchors rated for the load.
- Don’t slide knives along the magnet—lift straight off to avoid dulling edges. Place knives handle-up or with consistent orientation for quick reach.
Installation options:
- Wall-mounted stainless steel strips — very strong and low-profile; best for long-term installs.
- Wood-faced magnetic holders — stylish and sturdy, but verify magnet strength specs for heavy knives.
- Adhesive-backed magnetic strips — good for renters or short-term use; confirm the adhesive rating and weight limit in product specs.
Buyer notes: check product specs for magnet strength, recommended max knife weight, and installation hardware. For a typical small kitchen wall, a 12–18″ strip holds 4–6 common knives without crowding.

- ★Powerful Magnetic Knife Bar: This modern magnetic knife bar is made from strong magnets and covered in elegant, satin f…
- ★ Heavy-duty & Modern Design: This magnetic knife rack has a fully magnetic surface powered by a strong magnet, allows t…
- ★ Organize it All: This magnetic strip has an extended length that allows you to hold more knives than most knife blocks…
👉 Find magnetic knife strips on Amazon
💡 Pro Tip: Mount a strip near your main prep zone so knives are within reach while you chop—this keeps counter space clear and speeds up prep.
5. Use Rolling Carts for Extra Storage
When cabinets are full, a slim rolling cart adds instant storage without a renovation. These narrow carts slide into gaps—between the fridge and counter or between appliances—and provide extra shelves for spices, oils, pantry items, or everyday cookware.
A rolling cart also doubles as a mobile workstation: roll it next to your stove while you cook, then tuck it away when you’re done to free up counter space.
Measure before you buy:
- Measure the gap in inches. Common slim widths are 4″, 6″, and 9″—choose one that leaves a tiny clearance so the cart slides easily.
- Check cart depth against your counter overhang and door swing. Typical depths range from 12″–18″.
- Confirm height relative to adjacent counters so the cart can act as a stable prep surface if needed.
What to look for:
- Wheel locks: choose a cart with reliable locking casters to prevent rolling during prep.
- Weight capacity: metal carts often support heavier items (sauce pans, jars) while wooden carts are more decorative but may have lower load limits.
- Material and finish: powder-coated steel resists rust in humid kitchens; laminated wood looks warmer but consider water exposure near the sink.
Smart ways to use a rolling cart:
- Coffee station: stash the grinder, mugs, and pods to free counter space.
- Prep cart: use the top for cutting boards and the shelves for oils, frequently used pans, or ingredients.
- Appliance corral: store a microwave, toaster, or blender on a dedicated rolling cart to keep them off the countertop when not in use.
Protect your floors: add felt pads or rubber caster guards if you have hardwood or tile to prevent scratches and slipping.
Quick buyer tips: look for a 3-tier rolling utility cart if you need mid-level storage; choose a narrow storage trolley (4″–9″) for very tight spaces; expect typical price ranges from $30–$120 depending on size and material.

- Large Capacity: Looking for More Pantry Space in Your Pantry? Look no further than our all-purpose rolling pantry storag…
- Floor-mount Storage Cart or Countertop Organizer Option: You can use the No-slip Feet to create a 3-tier fruit basket fo…
- Pantry Organization Baskets: Perfect for organizing the space under your pantry shelves, the rolling pantry cart helps y…
💡 Pro Tip: Use one as a mobile coffee or prep station to reclaim counter space and keep the most-used tools within reach.
6. Switch to Stackable Food Containers
Mismatched containers and stray lids are quick ways to lose pantry space and fill up your fridge. Switching to a set of matching, stackable food containers instantly frees up shelf real estate, makes items easier to spot, and reduces waste by keeping food fresher and more visible.
Airtight containers are particularly useful: they help extend freshness for many items (though storage life varies by food), and clear containers let you see what you have at a glance so nothing gets forgotten at the back.
Choosing the right containers:
- Material: glass is durable, stain-resistant, and microwave-safe (more expensive per piece); BPA-free plastic is lightweight and budget-friendly—look for dishwasher-safe options.
- Sizes & measuring in inches: common useful sizes include narrow 4″ x 4″ x 3″ snack/portion containers, medium 6″ x 4″ x 3″ for leftovers or cereal, and larger 8″ x 6″ x 4″ for bulk items. Consider 1L and 2L containers for frequently used staples.
- Stackability: choose containers with uniform lids and nesting shapes so they stack securely in your pantry and fridge.
Cost & value:
- Price ranges (approx): sets of plastic stackable containers commonly run $20–$40 for 10–15 pieces; glass sets are often $30–$80 depending on brand and lid quality.
- Think long-term: higher-quality glass pays off if you use them daily and need oven-safe or stain-free options.
Where to use them:
- Pantry: dry goods like rice, pasta, and baking mixes go in larger stackable bins labeled by contents.
- Fridge: clear airtight containers for leftovers, prepped meals, and produce to maximize fridge shelf space.
- Cabinets: small stackable bins for snacks, individually wrapped pantry items, or tea/coffee pods.
Labeling & rotation: use chalkboard stickers or a label maker with the date opened. For perishables, write a use-by date to reduce waste and keep your small kitchen running smoothly.
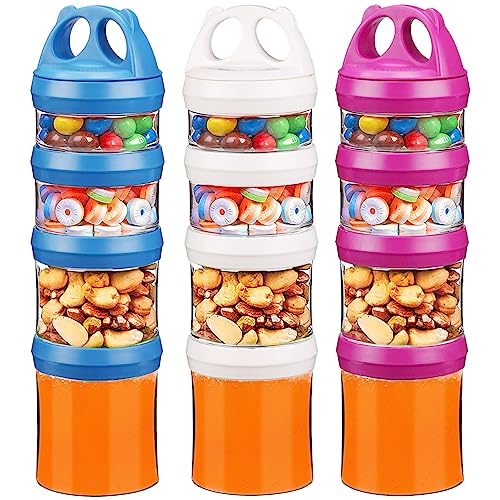

- Superior Bundle: This kitchen organizers and storage set comes with 4PCS (5.2L / 176oz) food storage contianers with sna…
- Sealing Safe: These flour and sugar containers are equipped with a silicone sealing strip and four locking lids to ensur…
- Stackable Design: This food storage containers for pantry has an excellent stackable design, the large food storage cont…
👉 Check out stackable food storage on Amazon
💡 Pro Tip: Pick one size to start—swap out mismatched containers in a single shelf or fridge zone first, then expand your set as needed to standardize storage across the kitchen.
7. Hang Mugs & Utensils
Mugs and utensils can quickly take over cabinets and drawers. Free up that shelf and reclaim cabinet space by hanging items instead. Under-cabinet mug hooks or adhesive wall hooks keep mugs visible and within reach, while wall-mounted rails with S-hooks hold spatulas, ladles, and tongs for easy access during prep.
Practical spacing & weight tips:
- Spacing: leave about 3–4 inches between mug hooks so handles don’t bump; arrange frequently used mugs closest to the prep zone.
- Weight limits: most adhesive hooks safely hold 1–2 lbs (one mug); metal screw-in hooks or under-cabinet racks can support heavier mugs and grouped sets—check product specs before loading.
- Height: mount hooks 4–6 inches under the cabinet lip so mugs hang freely without hitting the countertop or backsplash.
Renter-friendly options & removal:
- Adhesive hooks: look for high-strength removables (command-style) rated for the weight you need; test on a hidden spot first to avoid finish damage.
- Under-cabinet hooks: often slide onto the cabinet face or screw in; choose the slide-in styles if you can’t drill.
- Temporary rail solutions: tension rods with S-hooks can work inside shallow nooks or between two vertical surfaces without drilling.
Utensil rail setup for efficient prep:
- Place a utensil rail within arm’s reach of your main prep area—about 12–18 inches above the counter—so you can grab tools without stepping away from the cutting board.
- Group by use: spatulas and turners near the stove, tongs and ladles closer to pots; keep knives off magnetic rails and in a dedicated spot for safety.
Styling & storage ideas:
- Use matching hooks or mixed finishes to turn practical storage into a design feature—arrange mugs by color or pattern for an attractive display.
- Mount a small rail above an island or coffee station to hold mugs, measuring spoons, and daily tools, freeing counter space for prep.

- 【Easy to Install】 Wall Hanger No Drilling Hanger, which can be installed on smooth walls such as tiles and glass more ea…
- 【Wide Applications】The Wall Mounted Rail have a wide use such as cups,mugs, spoons, spatulas, oven mitt, pots and pans, …
- 【Bearing Capacity】 : The Kitchen Hanger Rail is made of high-quality metal, spray painted for rust prevention, and has a…

- 【360 Degree Rotation】Each 360 Degree Rotatable Kitchen Hooks with 6 hooks can be 360 degree rotation,and is easy to hang…
- 【Nail-free Installation】 Our Utensil Hanger Racks is Drilling Free and easy to install, Simply Slide this Holder Rack Ov…
- 【Multi-function】 This Kitchen Utensil Holder Organizer is not only used in the kitchen, but also great for Hanging for k…
👉 See hanging kitchen hooks here
💡 Pro Tip: When using adhesive hooks, remove them slowly and heat the adhesive with a hairdryer first to minimize finish damage and clean removal.
8. Use Lazy Susans in Cabinets
If you’ve ever lost a bottle of olive oil or soy sauce in the back of a deep cabinet, a Lazy Susan turntable fixes that by letting you spin and grab items without digging. These low-cost rotating racks improve visibility and access in corner cabinets, deep pantry shelves, and even on fridge shelves.
Sizing & placement guide:
- Measure the cabinet or shelf diameter in inches. For standard corner cabinets, look for turntables at least 12″–16″ across; very narrow shelves may work with 8″–10″ small turntables.
- Check shelf depth and vertical clearance—2-tier Lazy Susans need extra headroom but double usable surface area.
- Pick a non-slip base or anti-skid pads to prevent sliding when you spin the tray; look for rubberized or silicone bottoms on the product spec.
Best uses and items to avoid:
- Ideal: oils, vinegars, condiments, salad dressings, spice jars, and small pantry items that benefit from easy access.
- Avoid: very heavy cookware or stacks of pots pans—turntables are best for lighter items unless the product specifically lists a high weight capacity.
Types to consider:
- 2-tier Lazy Susans — great for spices and small jars, doubling vertical storage inside a cabinet.
- Large non-slip turntables — useful for condiments and bottles on pantry shelves or inside the fridge.
- Clear acrylic trays — visually light and easy to clean, helpful for seeing labels at a glance.
Maintenance & stacking tips:
- Clean trays regularly—many are dishwasher-safe but check the manufacturer’s instructions.
- Stack similar items (sauces, oils) together to avoid tipping when spinning; place heavier bottles toward the center for stability.

- One Set for All Storage Needs: LAMU Lazy Susan turntable for cabinet comes in 3 convenient sizes to tackle any storage c…
- 360° Rotatable for Easy Access: Our Lazy Susan for table top with a reinforced base, rotates 360° smoothly and stable. N…
- Versatile Use and Space Saving: This Lazy Susan organizer is great for cabinet, kitchen countertop, fridge and pantry or…
💡 Pro Tip: Use a small Lazy Susan in the fridge for salad dressings and condiments so nothing gets lost at the back—rotate before you prep to grab what you need quickly.
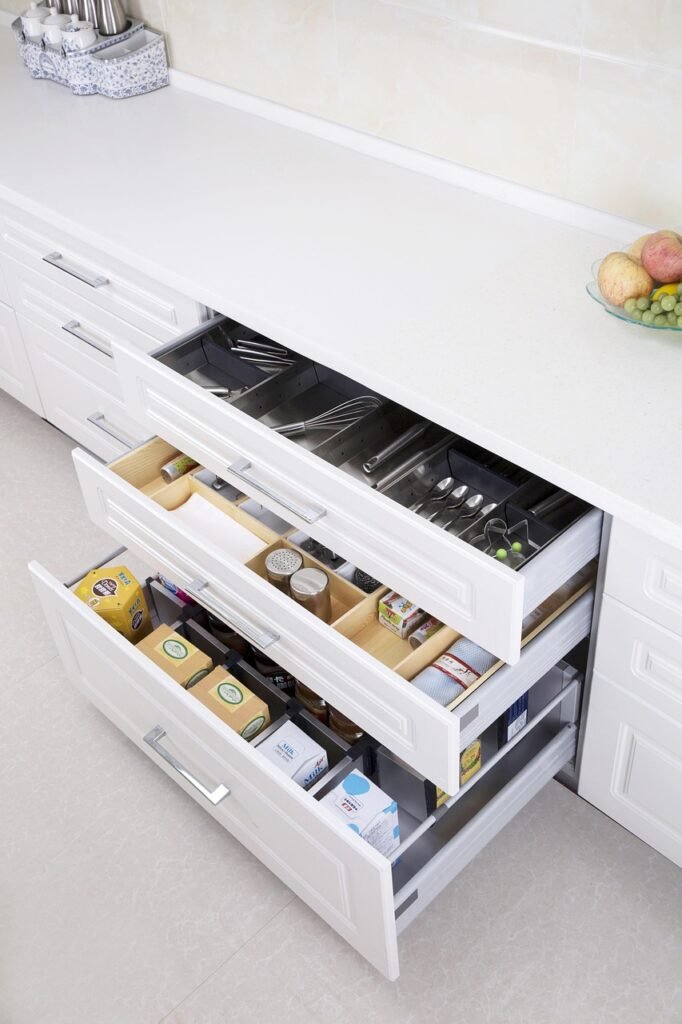
9. Organize Drawers with Dividers
Utensil drawers can quickly turn into a jumble of cutlery, gadgets, and random tools. Installing drawer dividers or expandable trays creates dedicated zones for knives, spoons, measuring tools, and larger utensils so everything has a place and is easy to reach during prep.
Dividers also tame “junk drawers”—use several small sections to separate batteries, twist ties, and small kitchen tools for better daily use of the space.
How to measure & choose:
- Measure drawer interior width, depth, and height in inches before buying. Common utensil drawer widths run from 12″–24″; depth is often 16″–22″. Note any drawer stops or undermount hardware that reduce usable length.
- Choose expandable dividers for adjustable fit (they typically expand to fit ranges like 10″–18″ or 18″–30″). For fixed-width drawers, buy a sized tray or a set of smaller organizers that fill the space.
- Check divider height—shallow trays work for forks/knives, while deeper trays are required for large utensils and tools (rolling pins, whisks).
Material options & care:
- Bamboo organizers look classic, resist warping, and are sturdy—wipe clean and avoid soaking.
- Plastic or silicone trays are often dishwasher-safe and are easy to sanitize if stored near the sink.
- Metal or coated wire dividers are durable for heavy tools but check for protective coatings to avoid scratching the drawer finish.
Organization ideas:
- Knife zone: keep sharp knives in a shallow, fitted tray or use a dedicated in-drawer knife block—always position the blade away from hands for safe reach.
- Baking tools: organize rolling pins, whisks, and measuring cups vertically with narrow dividers so they’re accessible without digging.
- Everyday utensils: group by function—spatulas and turners near the stove tools; measuring spoons and cups together for baking prep.
Special tips:
- Use labels or colored trays to help family members return items to the correct slot.
- Consider non-slip liner material to keep trays from shifting when you open and close drawers.
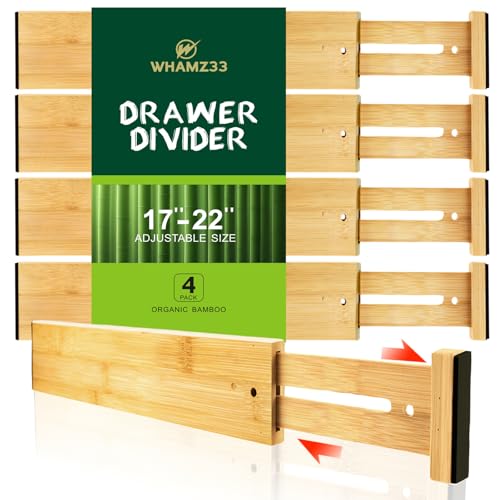
- Adjustable & Expandable:Our kitchen drawer dividers are adjustable from 17″ to 22″ to fit most kitchen drawers, dresser …
- Non-Slip & Secure:With a strong spring-loaded design and non-slip rubber pads, these bamboo drawer dividers stay securel…
- High-Quality Bamboo:Crafted from premium bamboo, these Kitchen Drawer Dividers combine durability with a sleek natural f…
👉 Find drawer dividers on Amazon
💡 Pro Tip: Start with one drawer: measure it, choose a divider system that fits those inches, and test the layout for two weeks—small changes here save minutes every day during cooking.
10. Maximize Fridge Space with Bins
A cluttered fridge makes meal prep harder and increases food waste. Clear stackable fridge bins create visual zones for snacks, produce, drinks, and leftovers so you can see everything at a glance and grab what you need quickly.
Bins also keep items grouped and prevent small packages from rolling to the back of the shelf—an easy win for small kitchen organization.
Sizing & placement tips:
- Measure shelf width and height in inches before buying. Common useful bin widths are 6″, 9″, and 12″; depths usually match fridge shelf depths (12″–16″).
- Use shallow bins (about 2–3″ tall) on door shelves and deeper bins (4–6″) on main shelves for meal prep containers and bulk items.
- For narrow fridges, choose slim bins (6″ wide) or a single long bin across the shelf to keep items contained without blocking airflow.
How to zone the fridge:
- Top shelf: ready-to-eat foods, leftovers, and prepared meals in clear stackable bins for quick access.
- Middle shelves: dairy and drink organizers—use soda can organizers or tall bins for bottles.
- Crisper/drawers: keep produce in breathable bins or perforated containers; rotate weekly to reduce spoilage.
- Door: frequently used condiments and small pantry items in narrow bins with handles for easy removal.
Material & product notes:
- Choose food-safe plastic labeled BPA-free and rated for cold storage.
- Look for clear products so labels are visible; bins with handles make it simple to pull a category out to prep or clean.
- Stackable egg holders and non-slip liner pads help maximize vertical space and keep items stable.
Maintenance & rotation:
- Wipe bins weekly and remove expired items—label bins with category and a “best by” rotation system to keep things moving.
- For families, assign each person a small labeled snack bin on a lower shelf so lunches are easy to assemble.

- ✅ Complete 6-Piece Set – Includes 2 wide bins, 2 narrow bins, 1 soda can organizer (holds 12 cans), and 1 egg holder (14…
- ✅ Maximize Fridge Organization – Perfect for keeping snacks, produce, drinks, yogurt, and eggs neatly stored. Great for …
- ✅ Space-Saving Design – Stackable and lightweight bins make the most of your fridge storage. Slim sizes fit anywhere, wh…
💡 Pro Tip: Start with one shelf: measure its inches, add one or two clear bins, and group like items to immediately gain usable space and reduce waste.
Bonus Tip: Rotate Seasonal Items
If your small kitchen doubles as seasonal storage for holiday baking pans, large serving trays, or specialty cookware, rotate those infrequently used items into labeled storage bins outside the kitchen to free up everyday space.
Quick rotation plan:
- Decide which items are truly seasonal (holiday bakeware, seasonal serving platters, specialty molds) and which are used year-round.
- Choose bin sizes in inches that match the items—common useful sizes are 18″ x 12″ x 10″ for medium bakeware and 24″ x 16″ x 12″ for larger trays or pot sets.
- Label each bin clearly with season and contents (e.g., “Winter Bakeware — cookie cutters, pie pans”) and store in a closet, garage shelf, or storage unit.
Renter-friendly alternatives:
- If you lack off-site storage, consider a vertical pot rack or tall shelving in a hallway closet to keep pots and large items accessible but out of kitchen cabinets.
- Rotate items seasonally—swap the current bin into the kitchen for the season’s needs and move last season’s bin out to reclaim valuable cabinet space.
👉 Quick checklist: pick three seasonal items to move this weekend, measure their bin dimensions in inches, and label the bin with season + contents before stashing it away.
Conclusion
Organizing a small kitchen doesn’t have to be overwhelming or expensive. With a handful of smart products and a few simple changes, you can reclaim counter space, improve storage, and make cooking and cleanup easier—without a full renovation.
From shelf risers and Lazy Susans to stackable food containers and clear fridge bins, the right organizers help your kitchen feel roomier and work better. These practical solutions focus on vertical storage, better reach, and smarter use of every inch of space.
Next steps (quick checklist):
- Pick one problem area (a crowded cabinet, a messy drawer, or a cluttered counter).
- Measure the space in inches so you buy the right-sized product.
- Choose one organizer to try this weekend—install it and test daily use for two weeks.
Try one small change today—measure one cabinet or drawer and order an organizer that fits. Small kitchen organization becomes manageable when you focus on one simple improvement at a time.
Note: Some links in this post may be affiliate links, which help support this site at no extra cost to you. Recommendations are chosen for usefulness and value.